
Presentria GO
Taking experiential learning to the next level
- Teachers can set up trips by pinning checkpoints on the Presentria GO system that is powered by Google Maps.
- Students physically visit these checkpoints and log in to https://go.presentria.com using their smartphones when they arrive.
- Based on the checkpoint location, students will be presented with questions to answer, online content, and/or PDF file for viewing.
- Students collect points after visiting these checkpoints.
- Teachers can set up the trip, and view the class' performance directly on the Presentria instructor portal.
- No programming is required. Just point and click.
- Perfect for experiential learning outside the classroom!
Follow these steps to create your trip!
Overview of the key steps:
1. Create questions in the Question Bank.
2. Run "Presentria GO" and create a "New Trip".
3. Define Checkpoint locations.
4. Create "New Task(s)" at the checkpoint.
5. Set advanced functions at the checkpoint.
6. Create the next checkpoint and question(s).
7. Configure checkpoint sequence, if required.
8. Start your "On-site" or "Virtual" trip.
9. Manage your trips and view reports in the portal.
Detailed Instructions:
 a. Sign up your Presentria account at https://www.presentria.com/web if you have not yet done so. Remember to activate your account using the link in our welcoming e-mail.
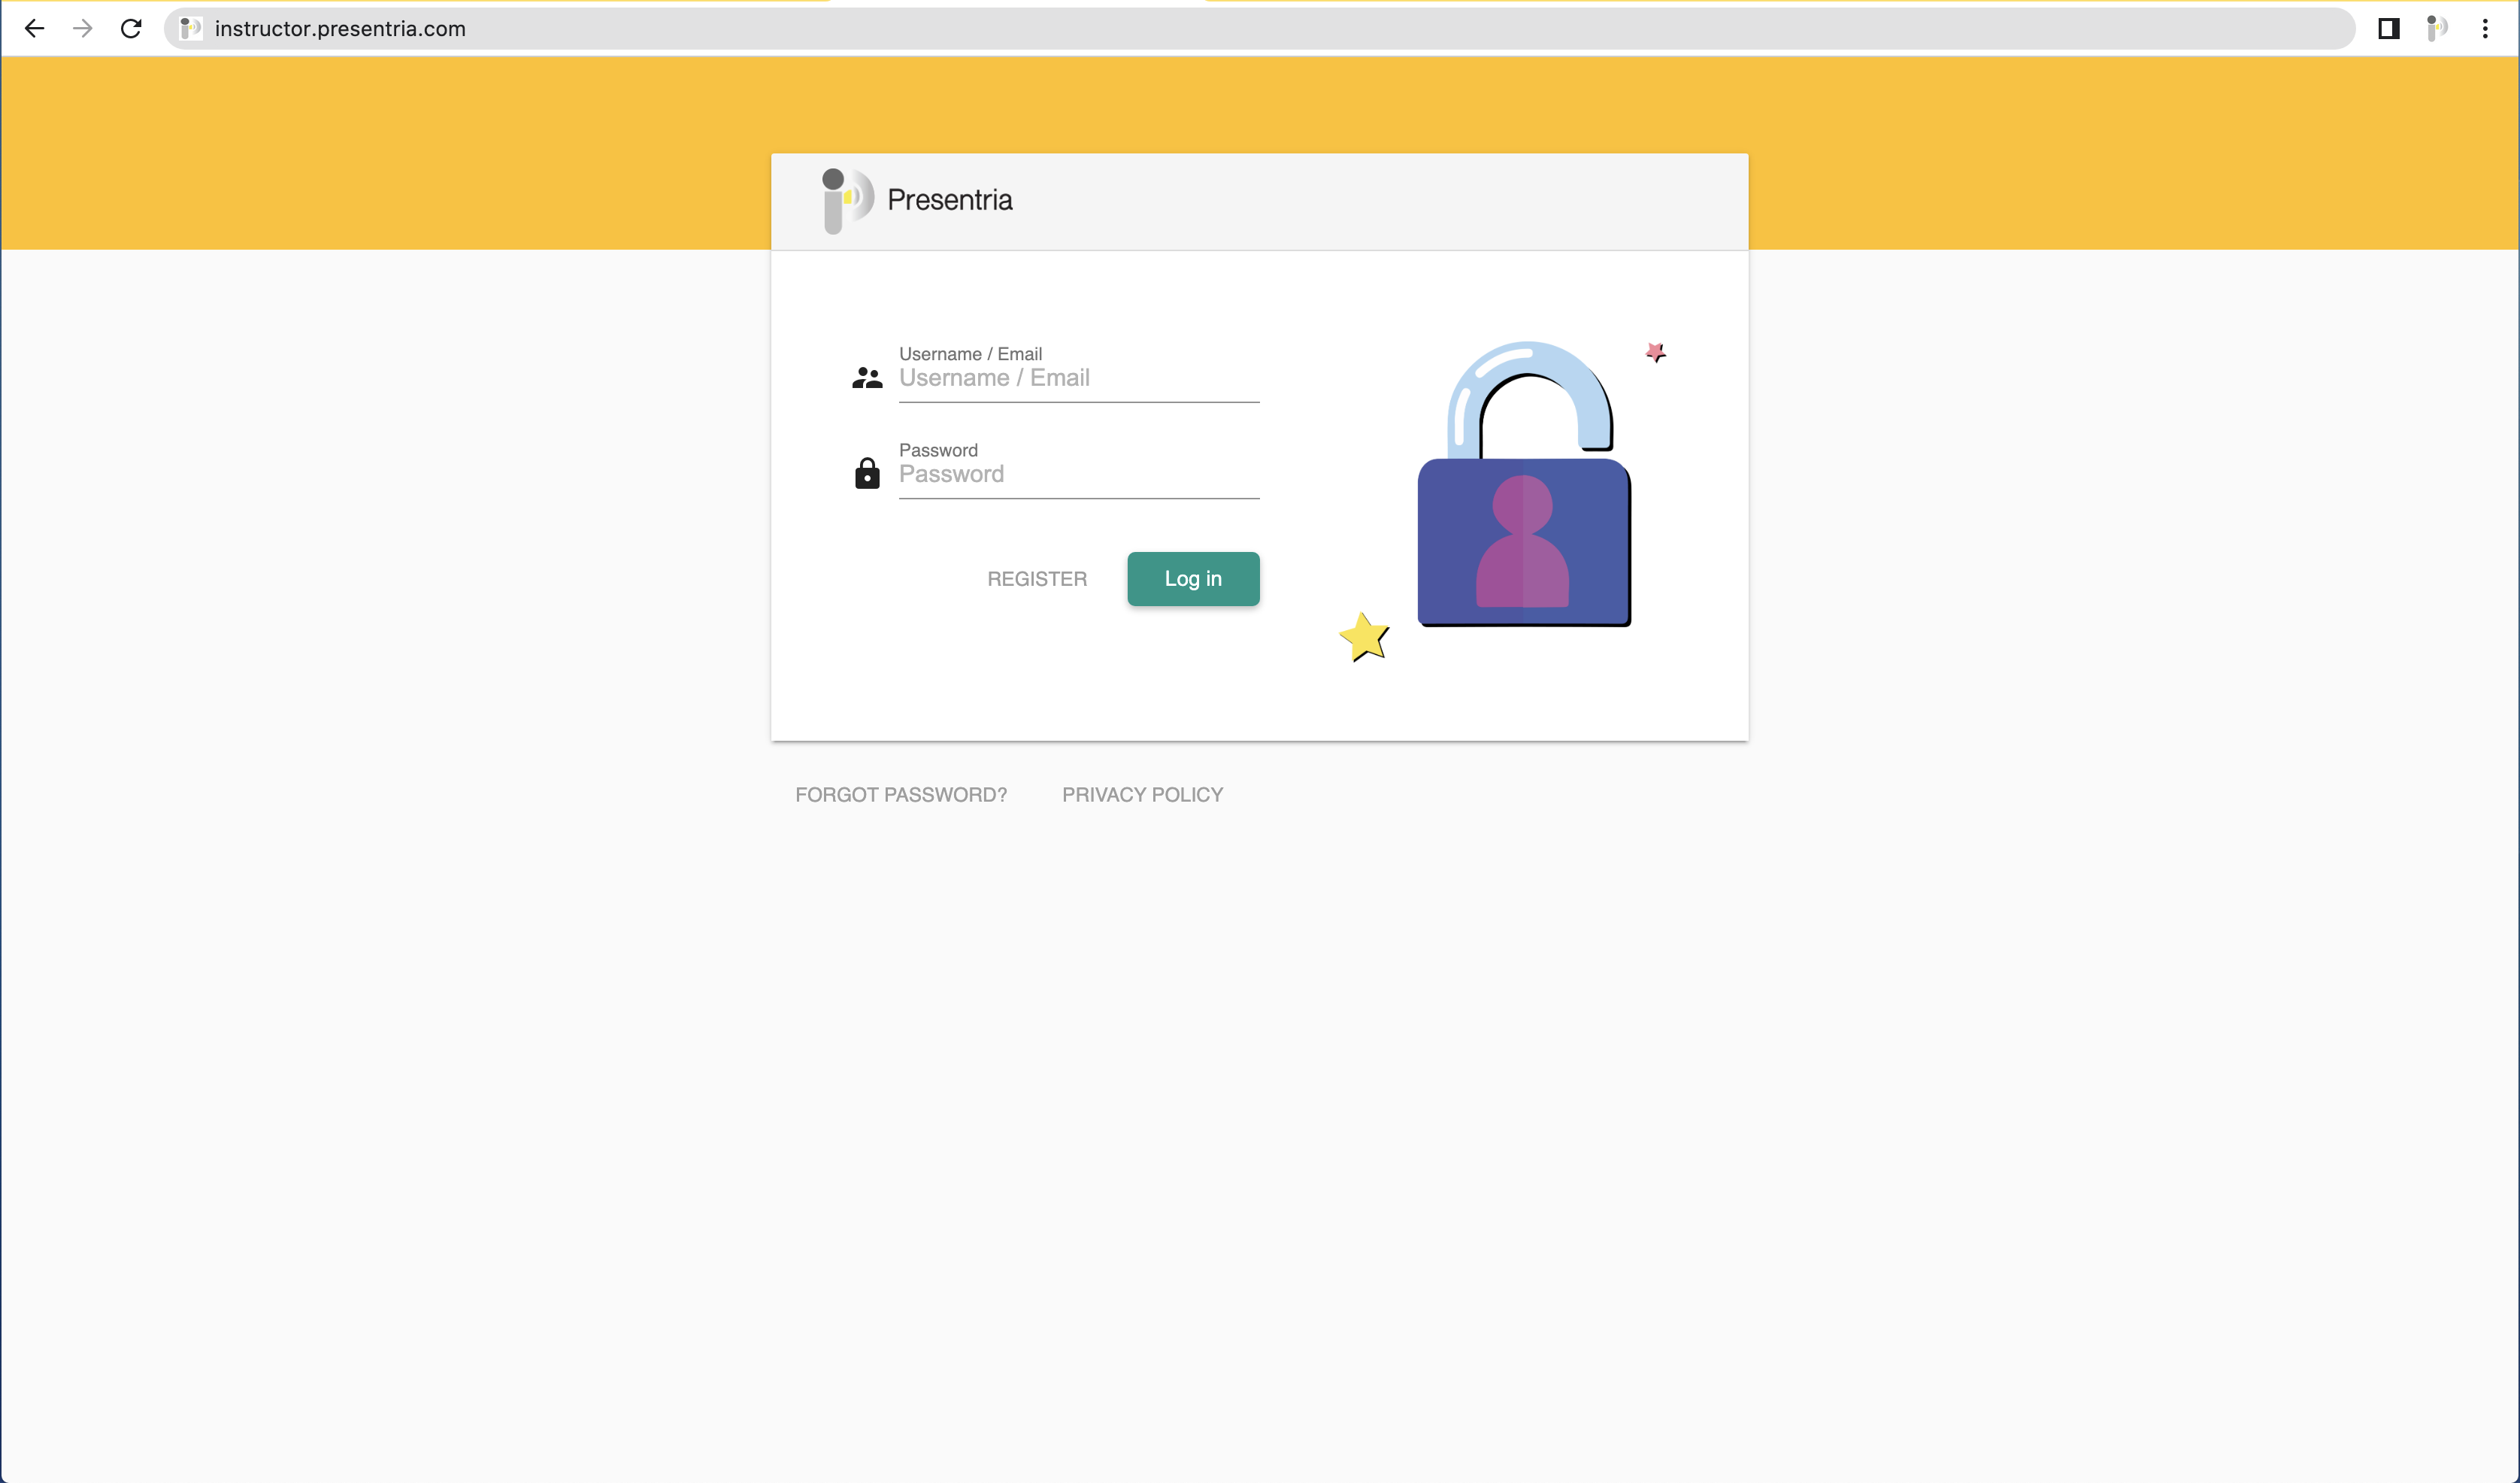
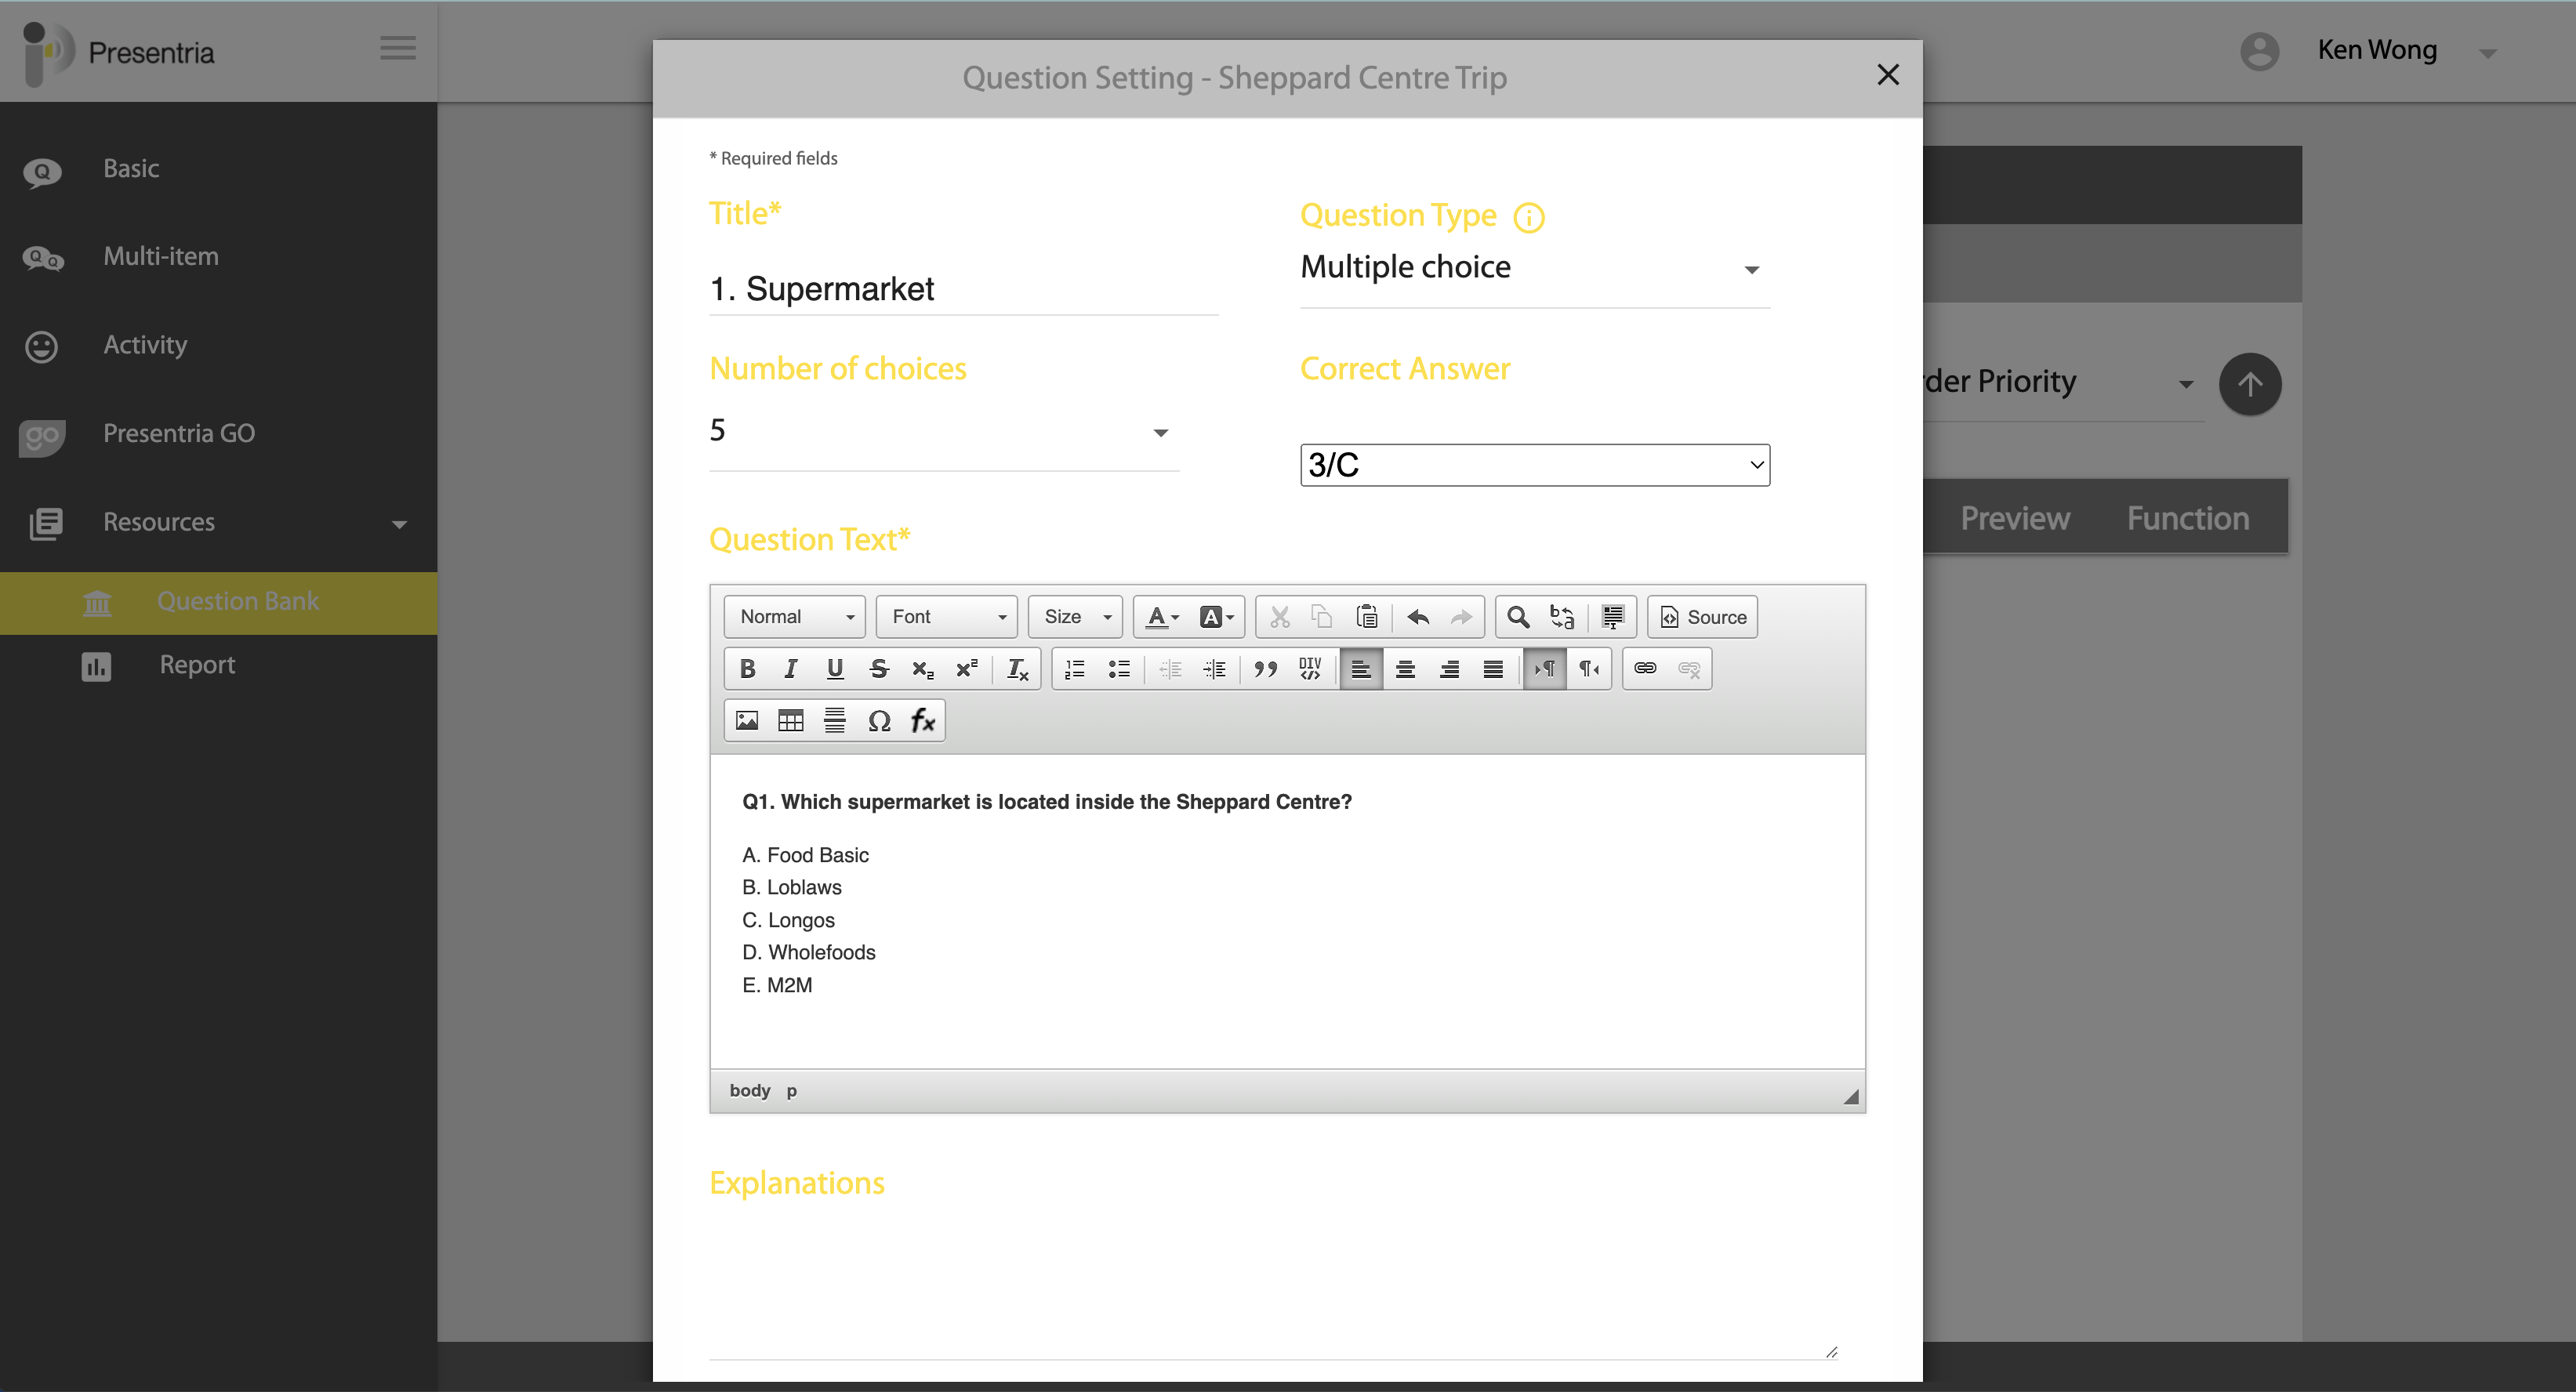
b. Log into the instructor portal at https://instructor.presentria.com, then select "Resources > Question Bank" to create your quiz.
c. You can create multiple-choice question, text (short-answer), and Likert-scale question in your quiz. For MCs, try to indicate the correct answer for each question so that points can be given to those students who answered it correctly.
d. If you want to show a YouTube video in a particular checkpoint, you can embed such YouTube video within a question. See instructions here.
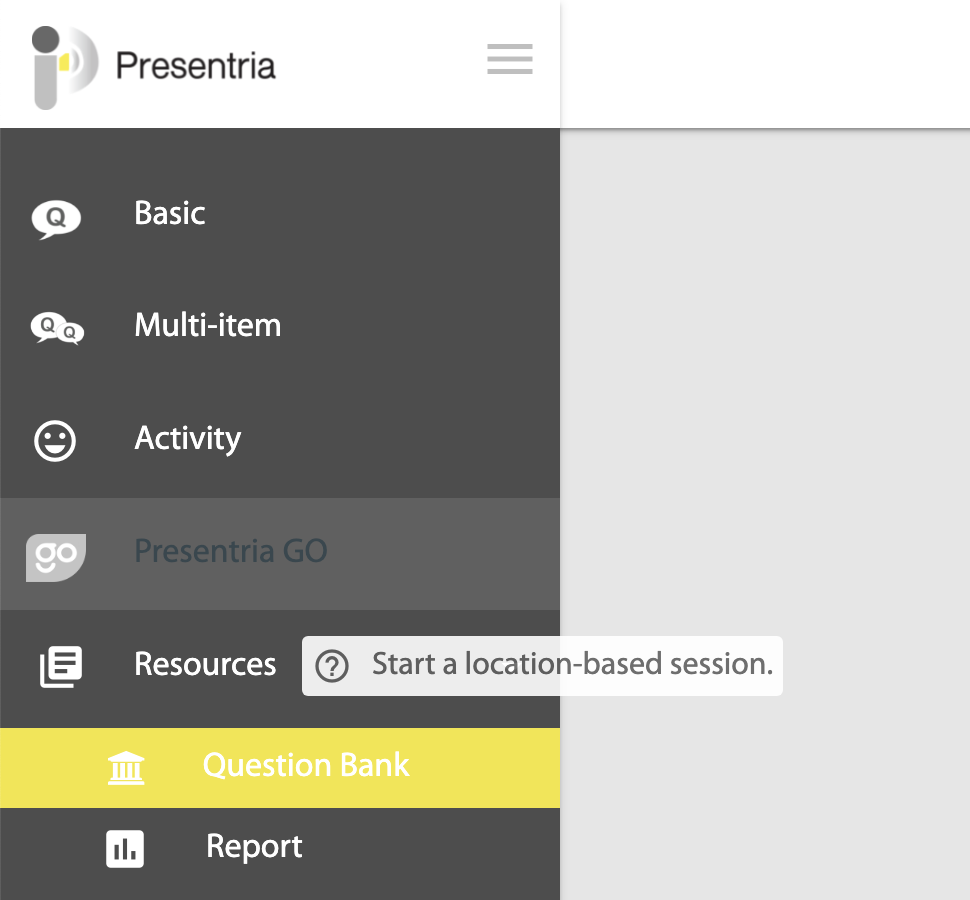
 a. Click "Presentria GO" on the left hand side menu.
b. You've arrived at the "My Saved Trips" screen. Click the green-color "+ New Trip" button to create your first Presentria GO Trip.

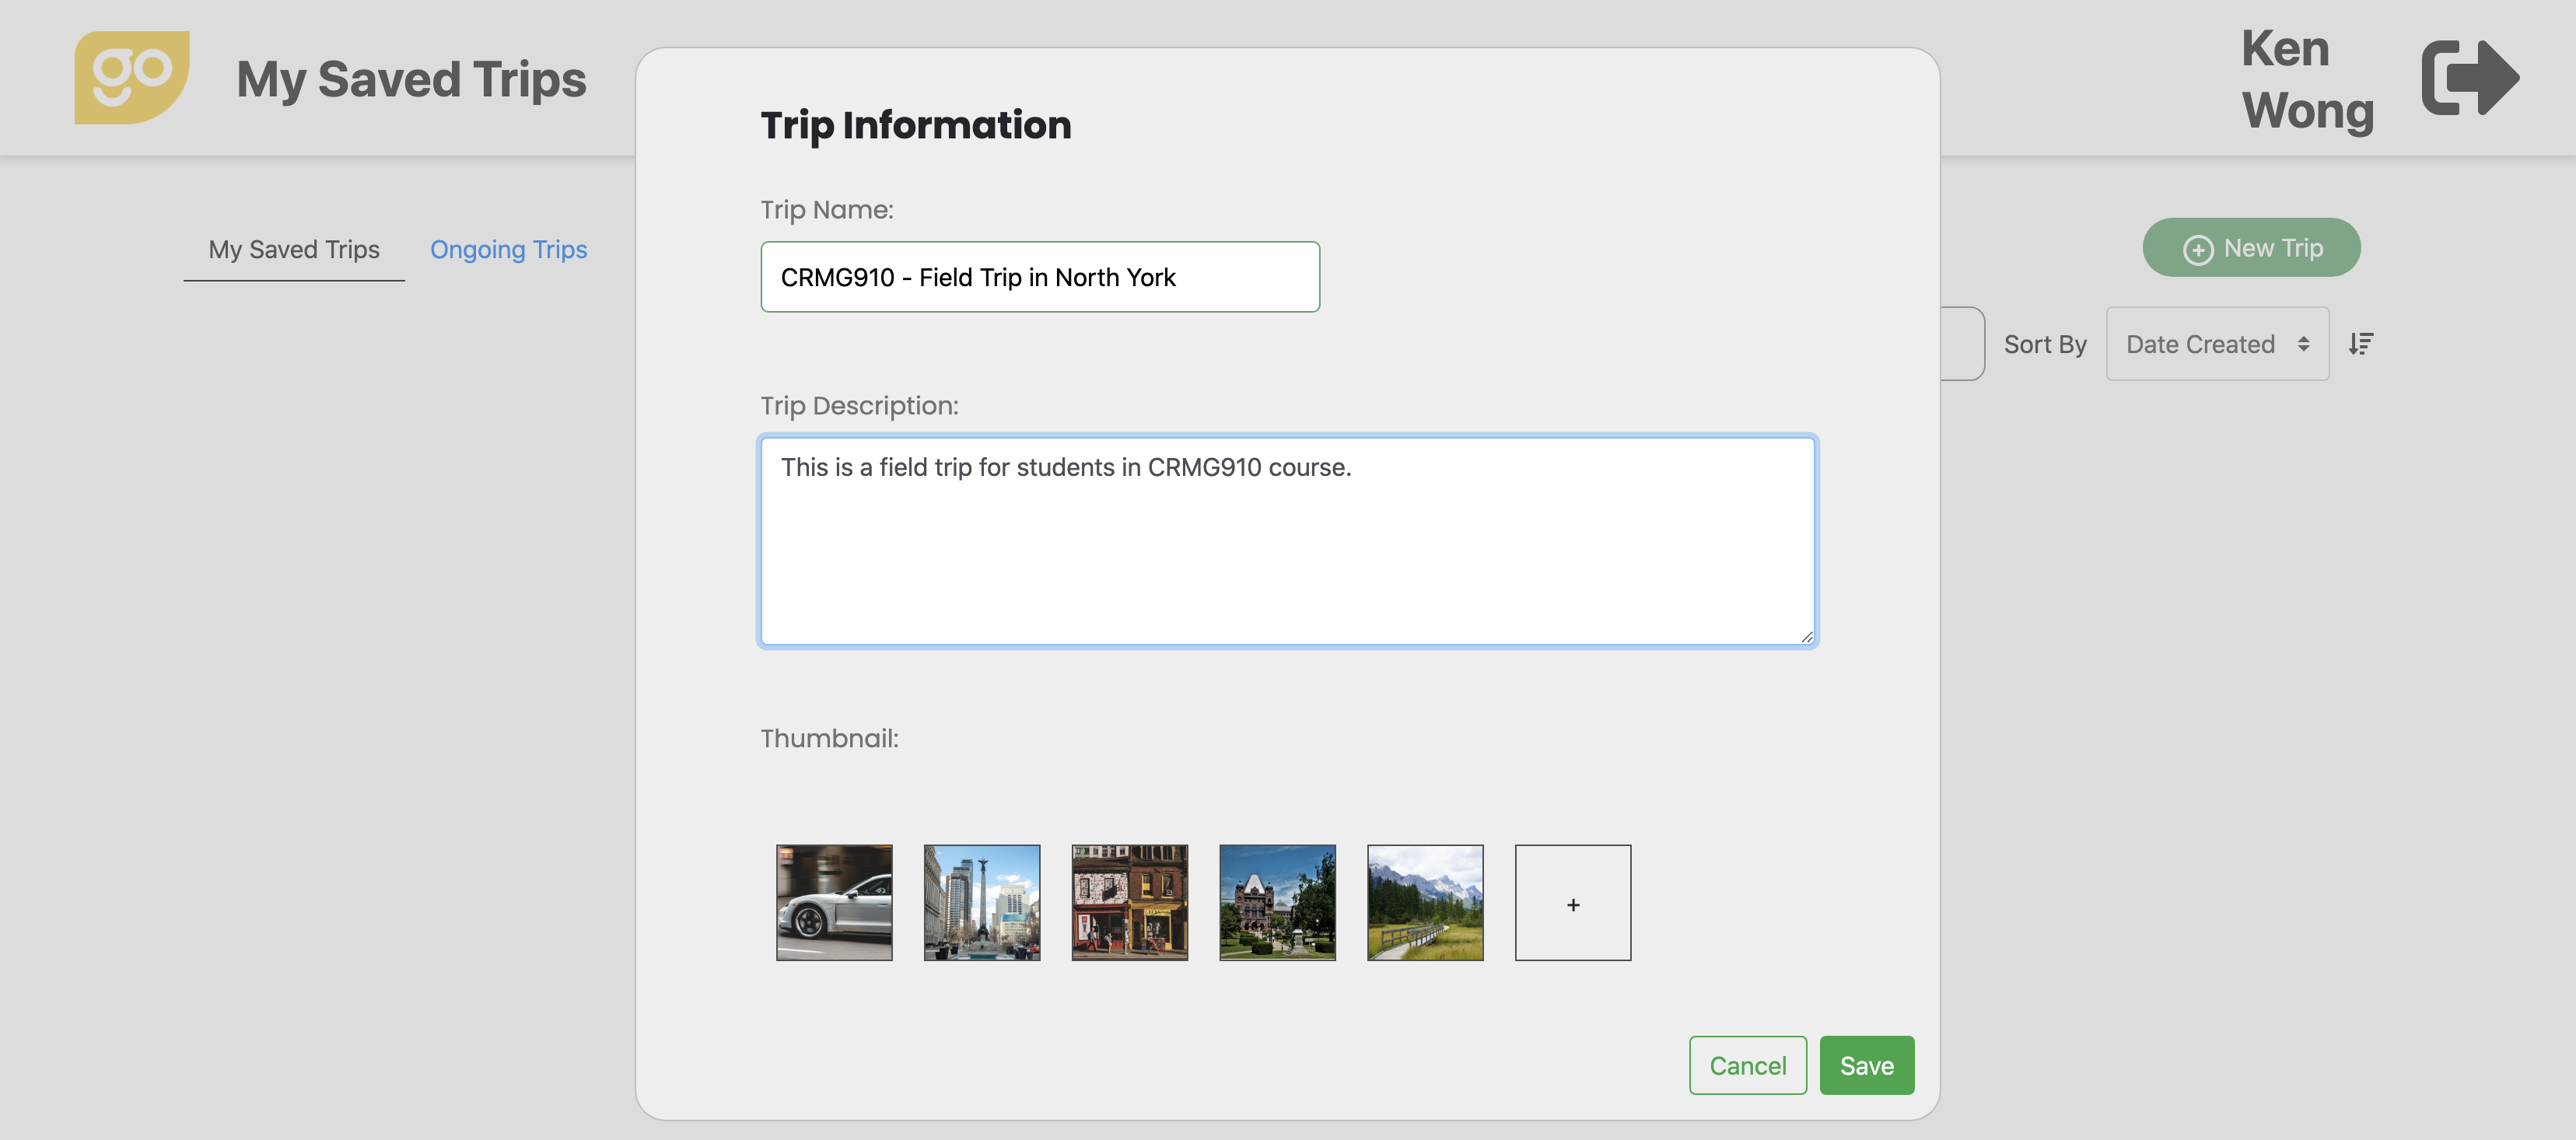
 a. Enter the trip name and description, then select a thumbnail for this trip. You can also upload your own photo/image as thumbnail by clicking the "+" button.
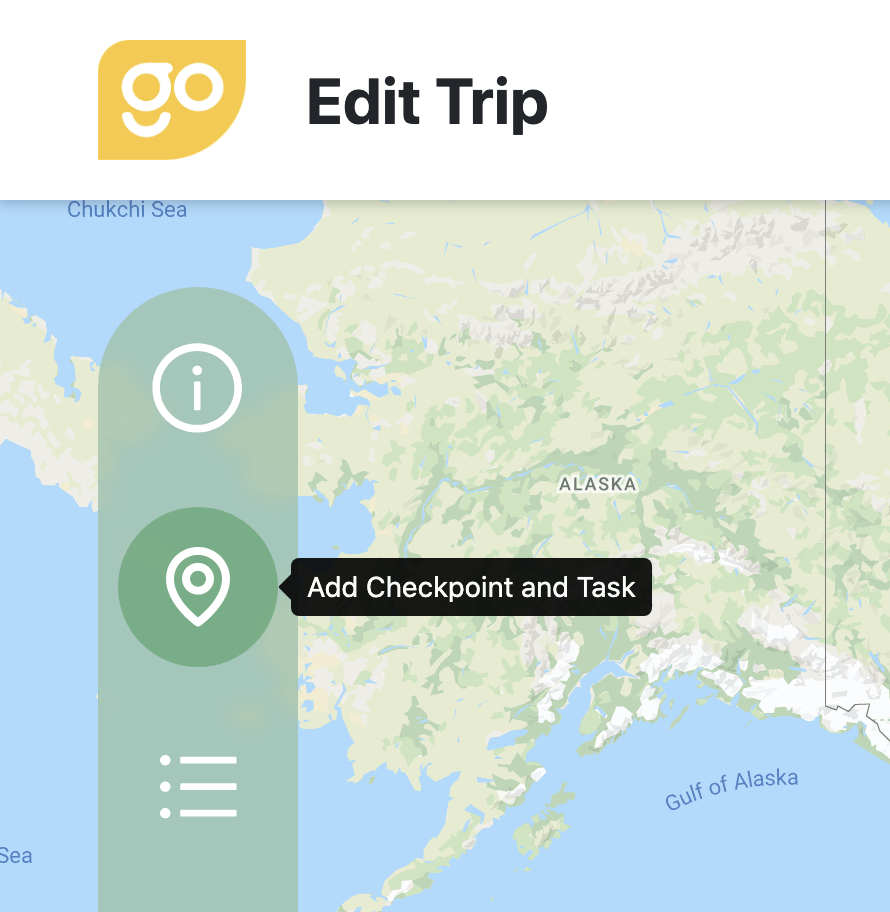
b. Click the 2nd icon to add your checkpoint location and task / questions.
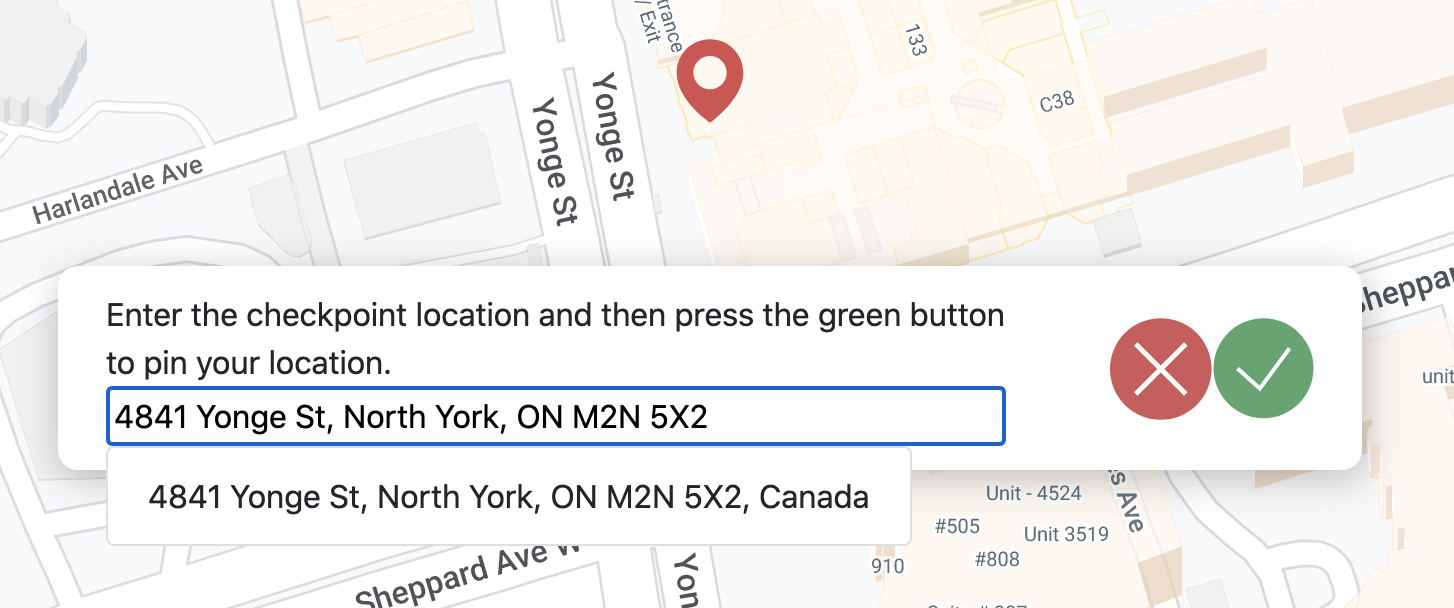
c. Type your first checkpoint location or address, as if you're using Google Map. Click the green tick button to pin your location on the map.
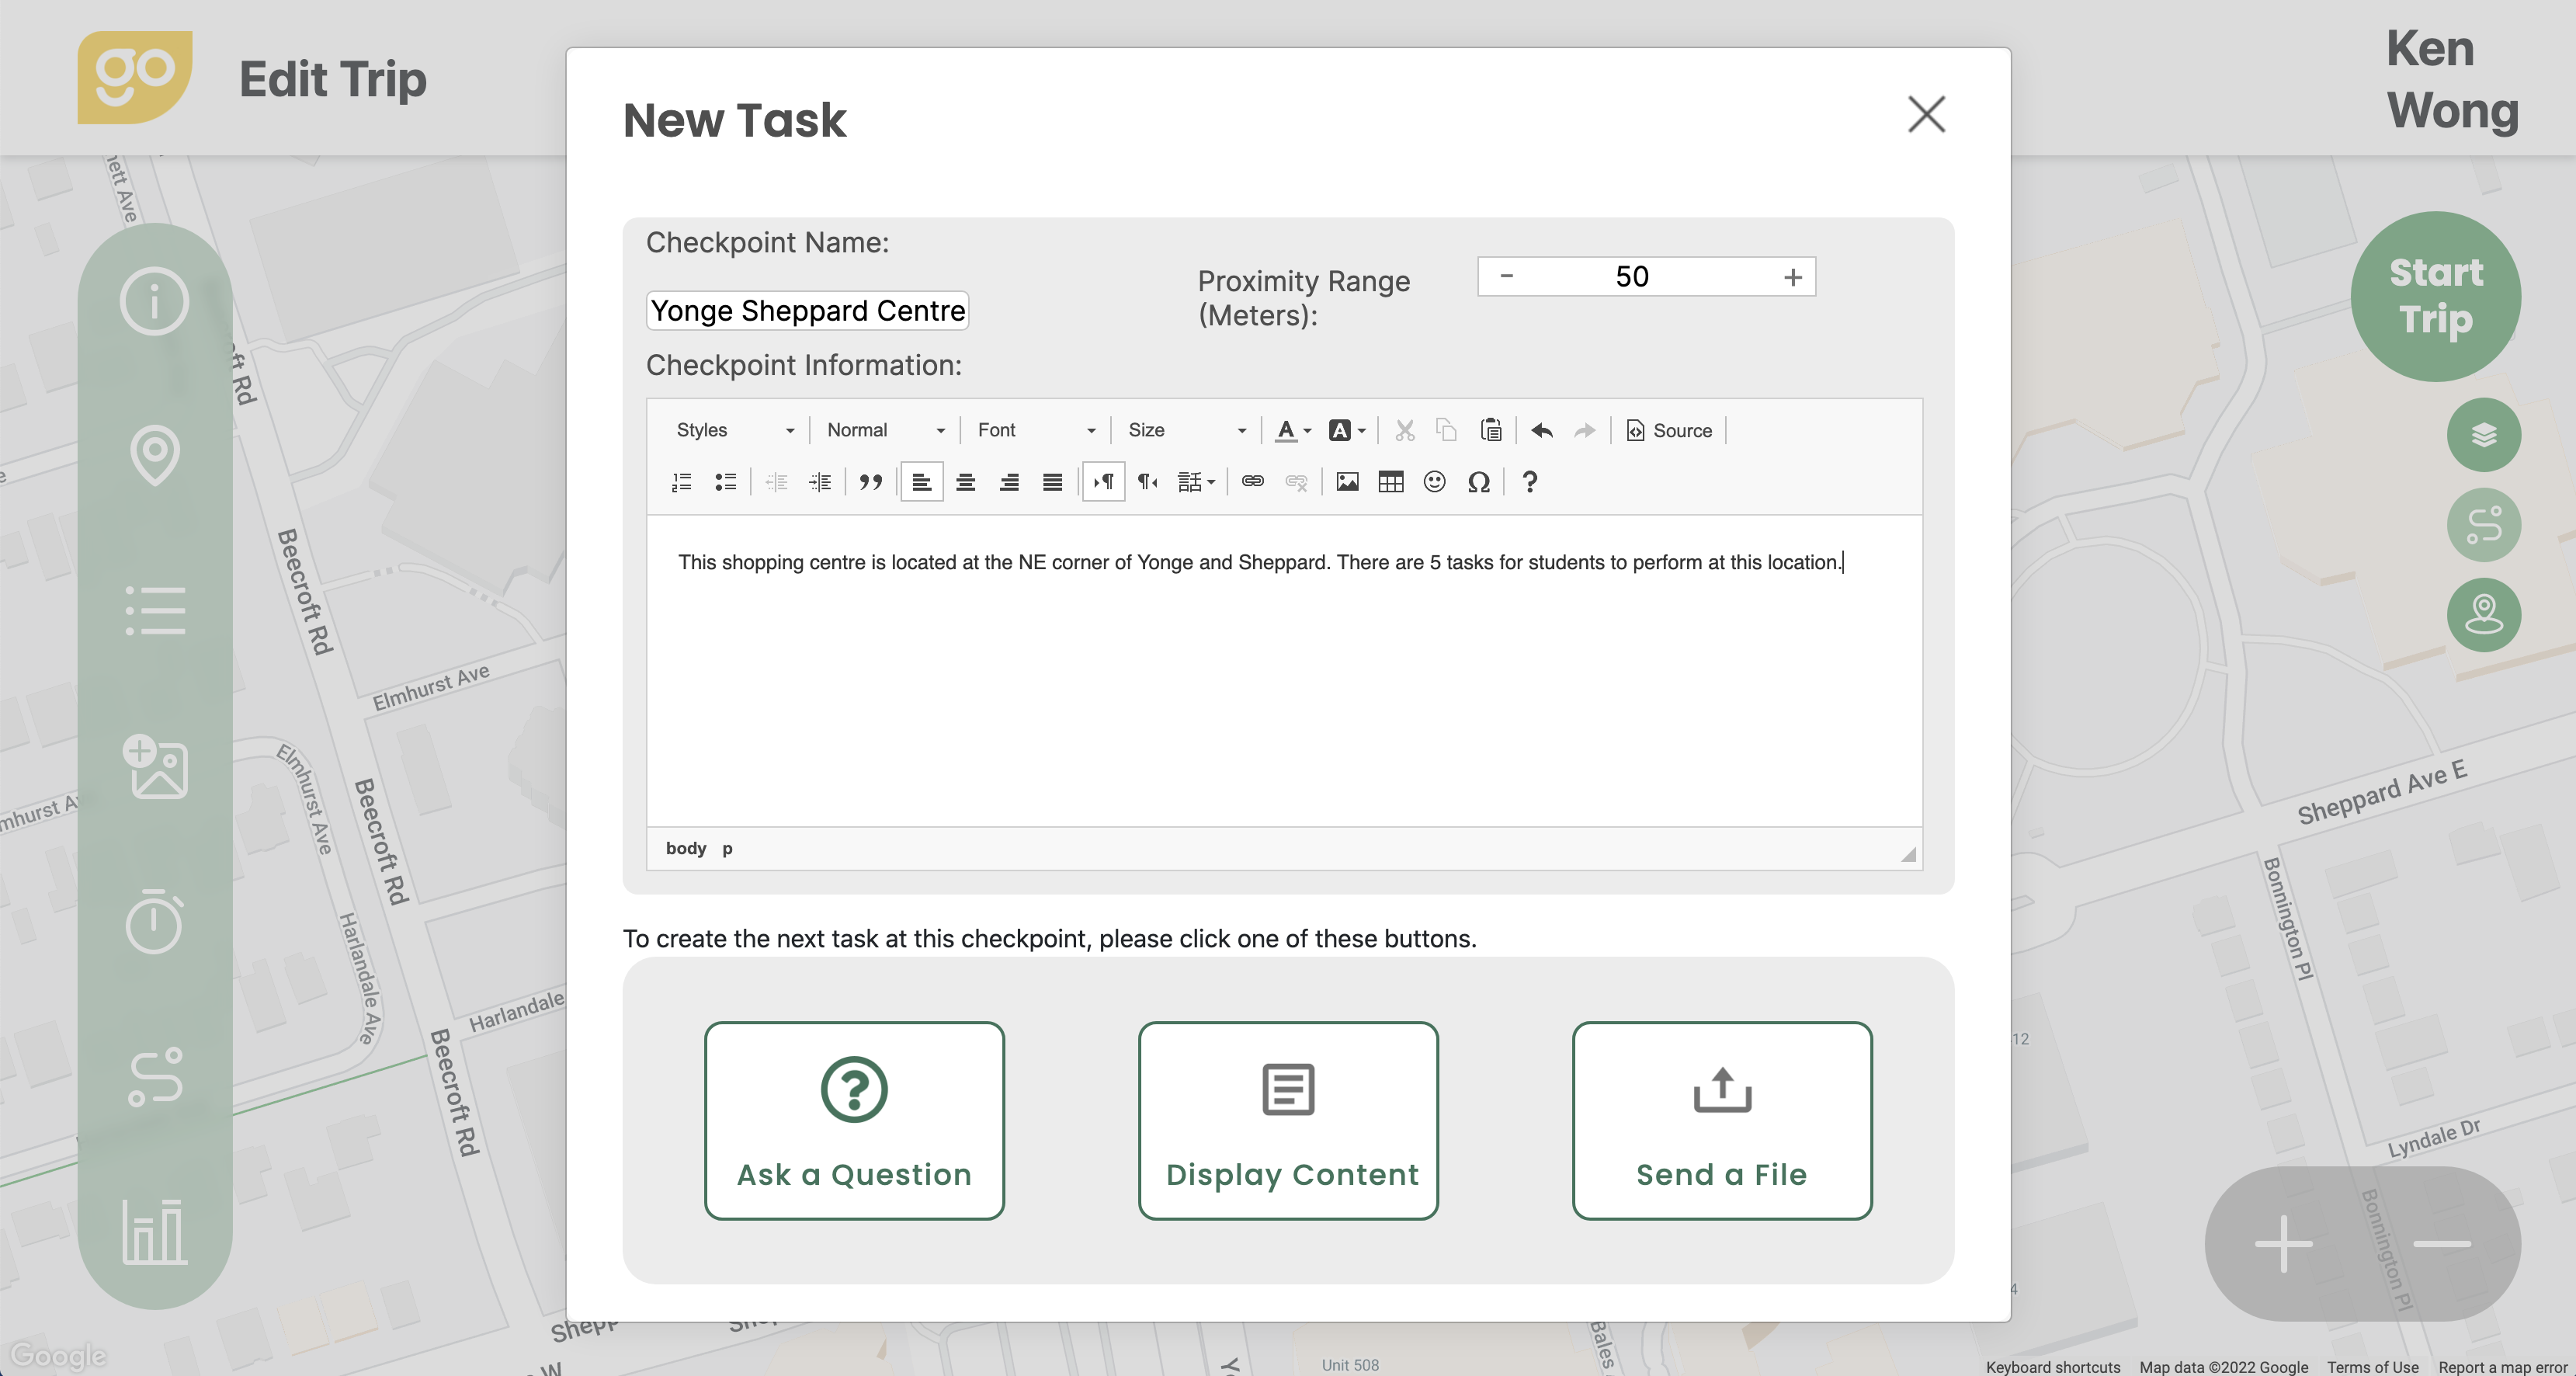
 a. In the New Task window, first name your checkpoint and write a short description about this location, then create your task(s) by clicking one of the 3 buttons. You can either ask a question, display content, or send (push) a file to your students in the field when they have arrived at that checkpoint location.
b. To ask a question, just type the question manually using the WYSIWYG text editor.
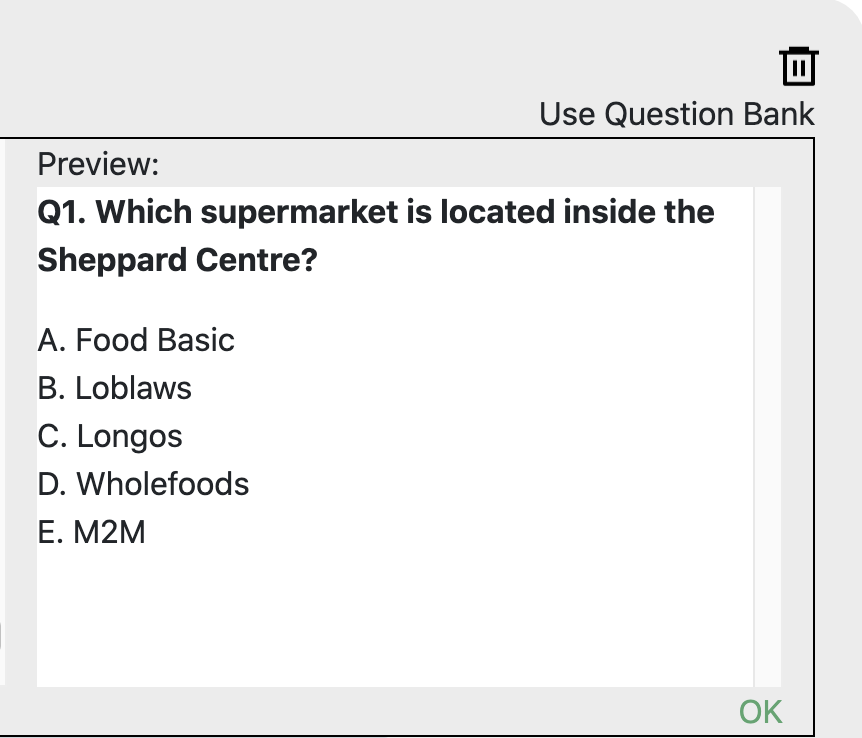
c. Alternatively, click the "Use Question Bank" link on the upper right-hand corner to select the question(s) that you have previously set up in the question bank. Click "OK" to use the question.
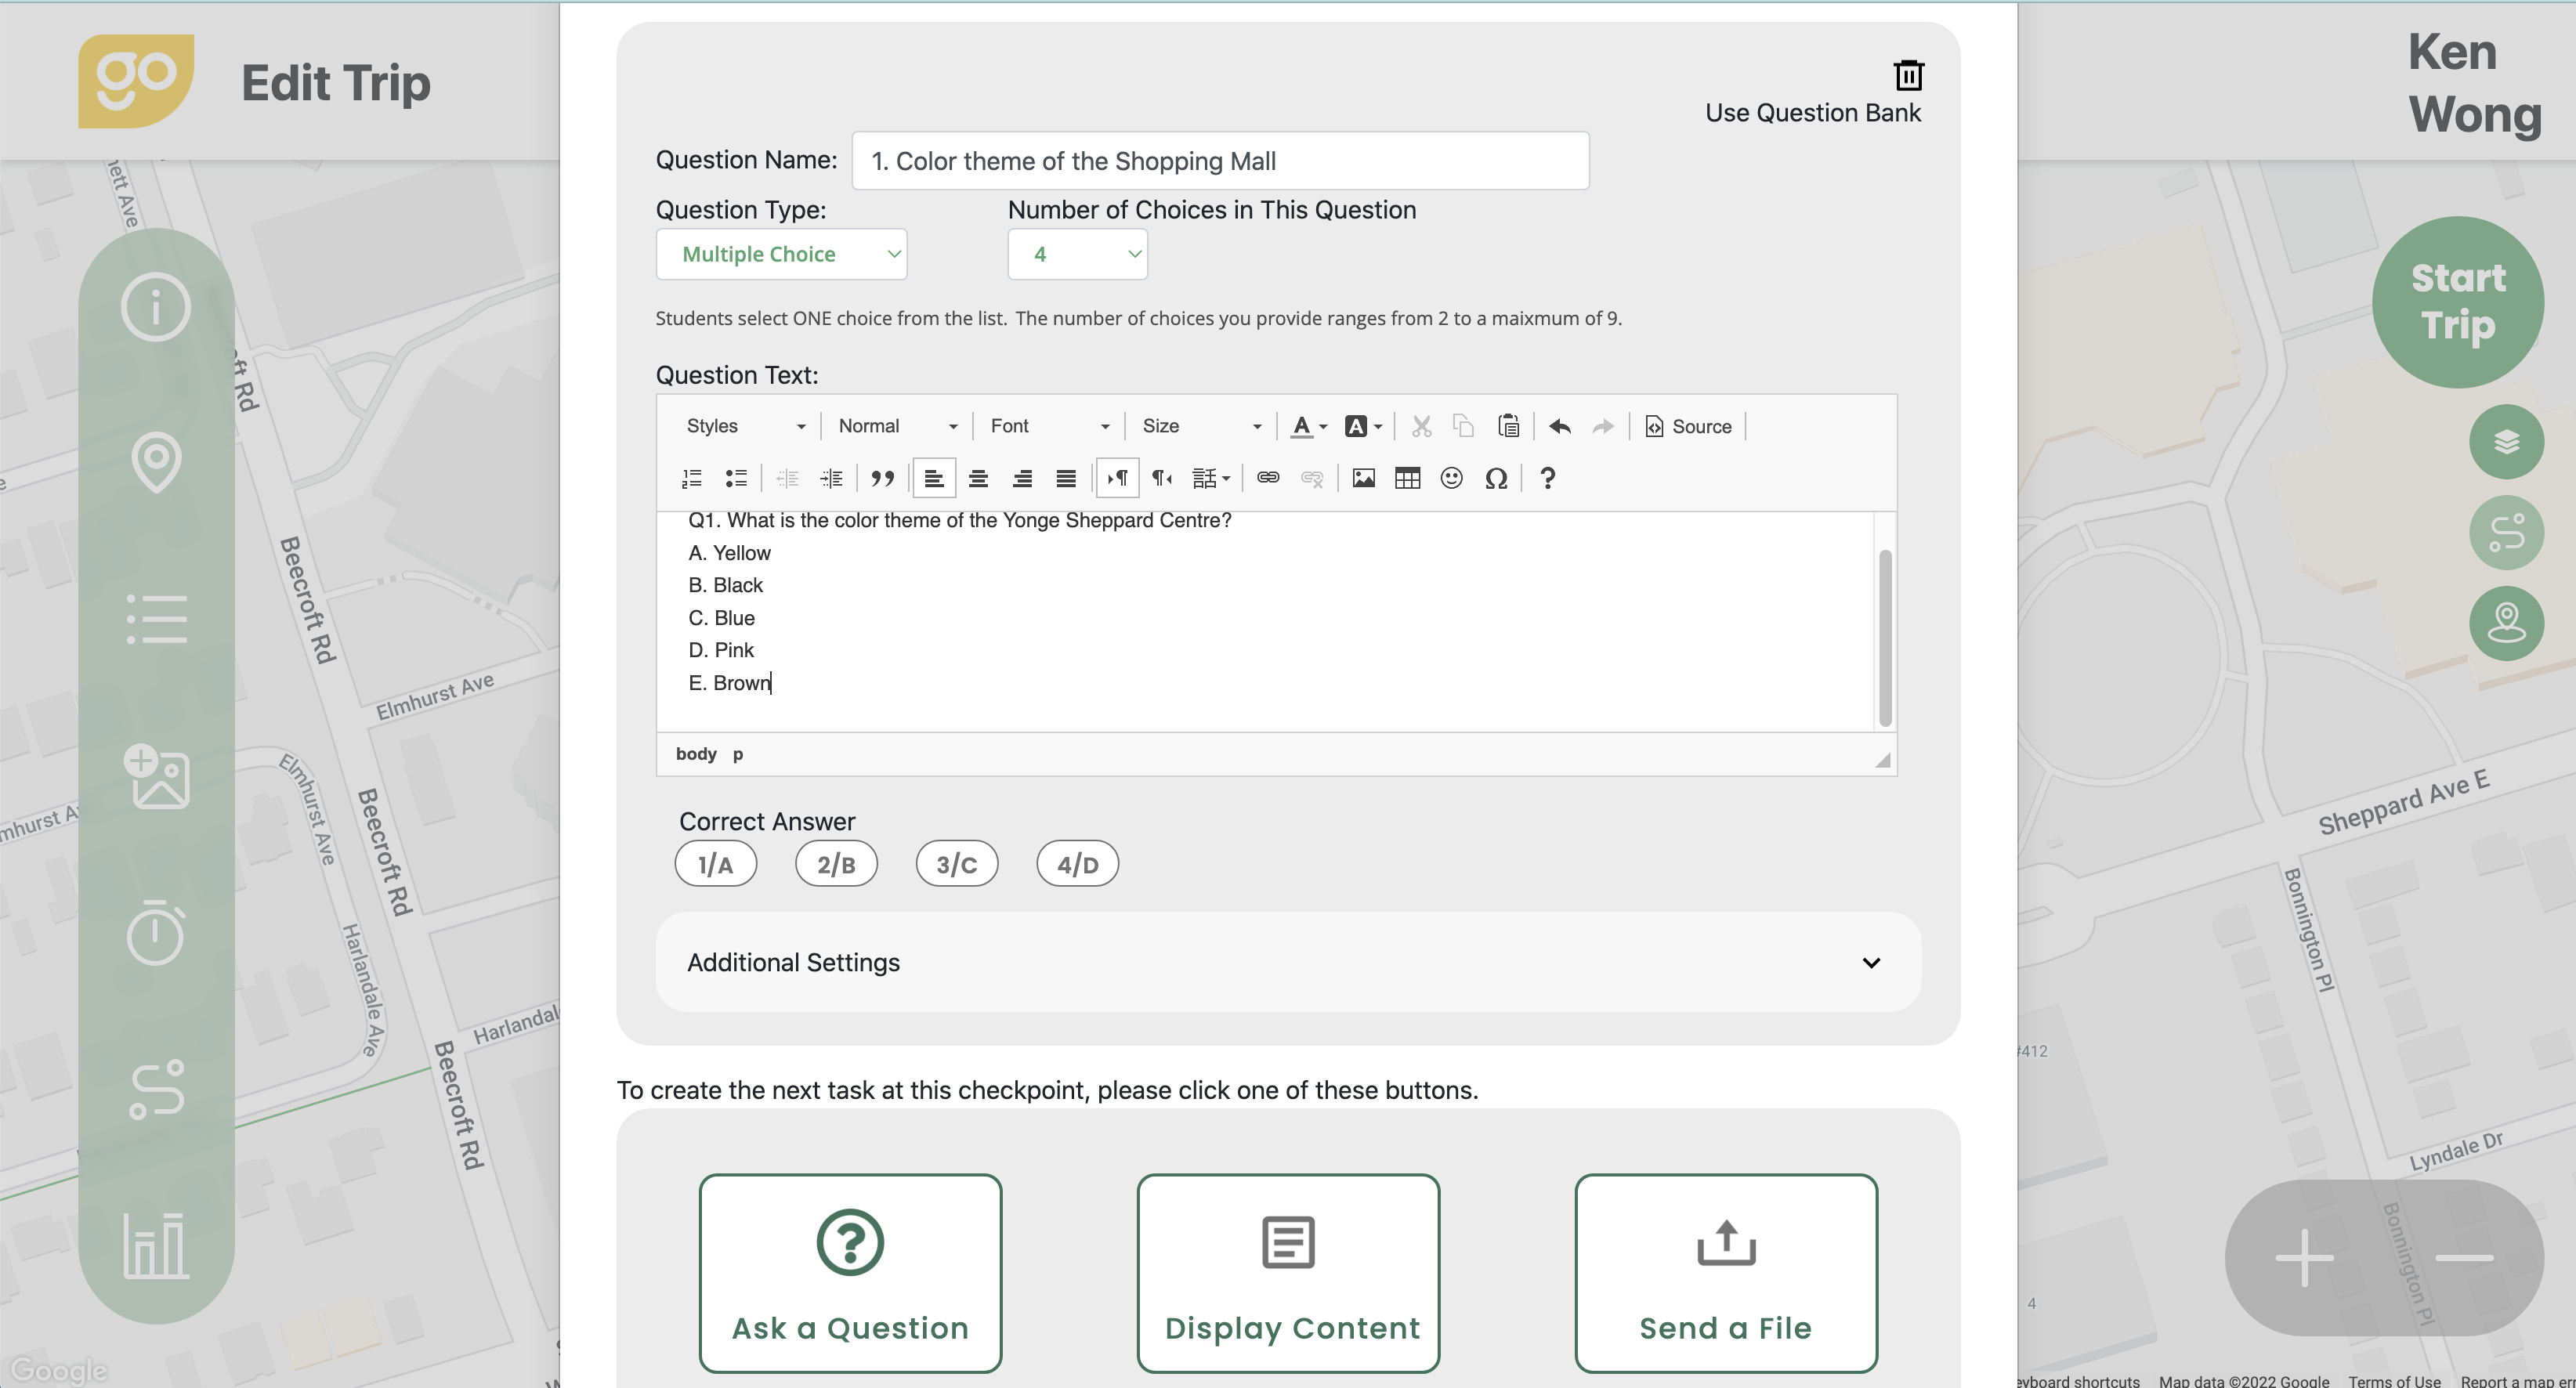
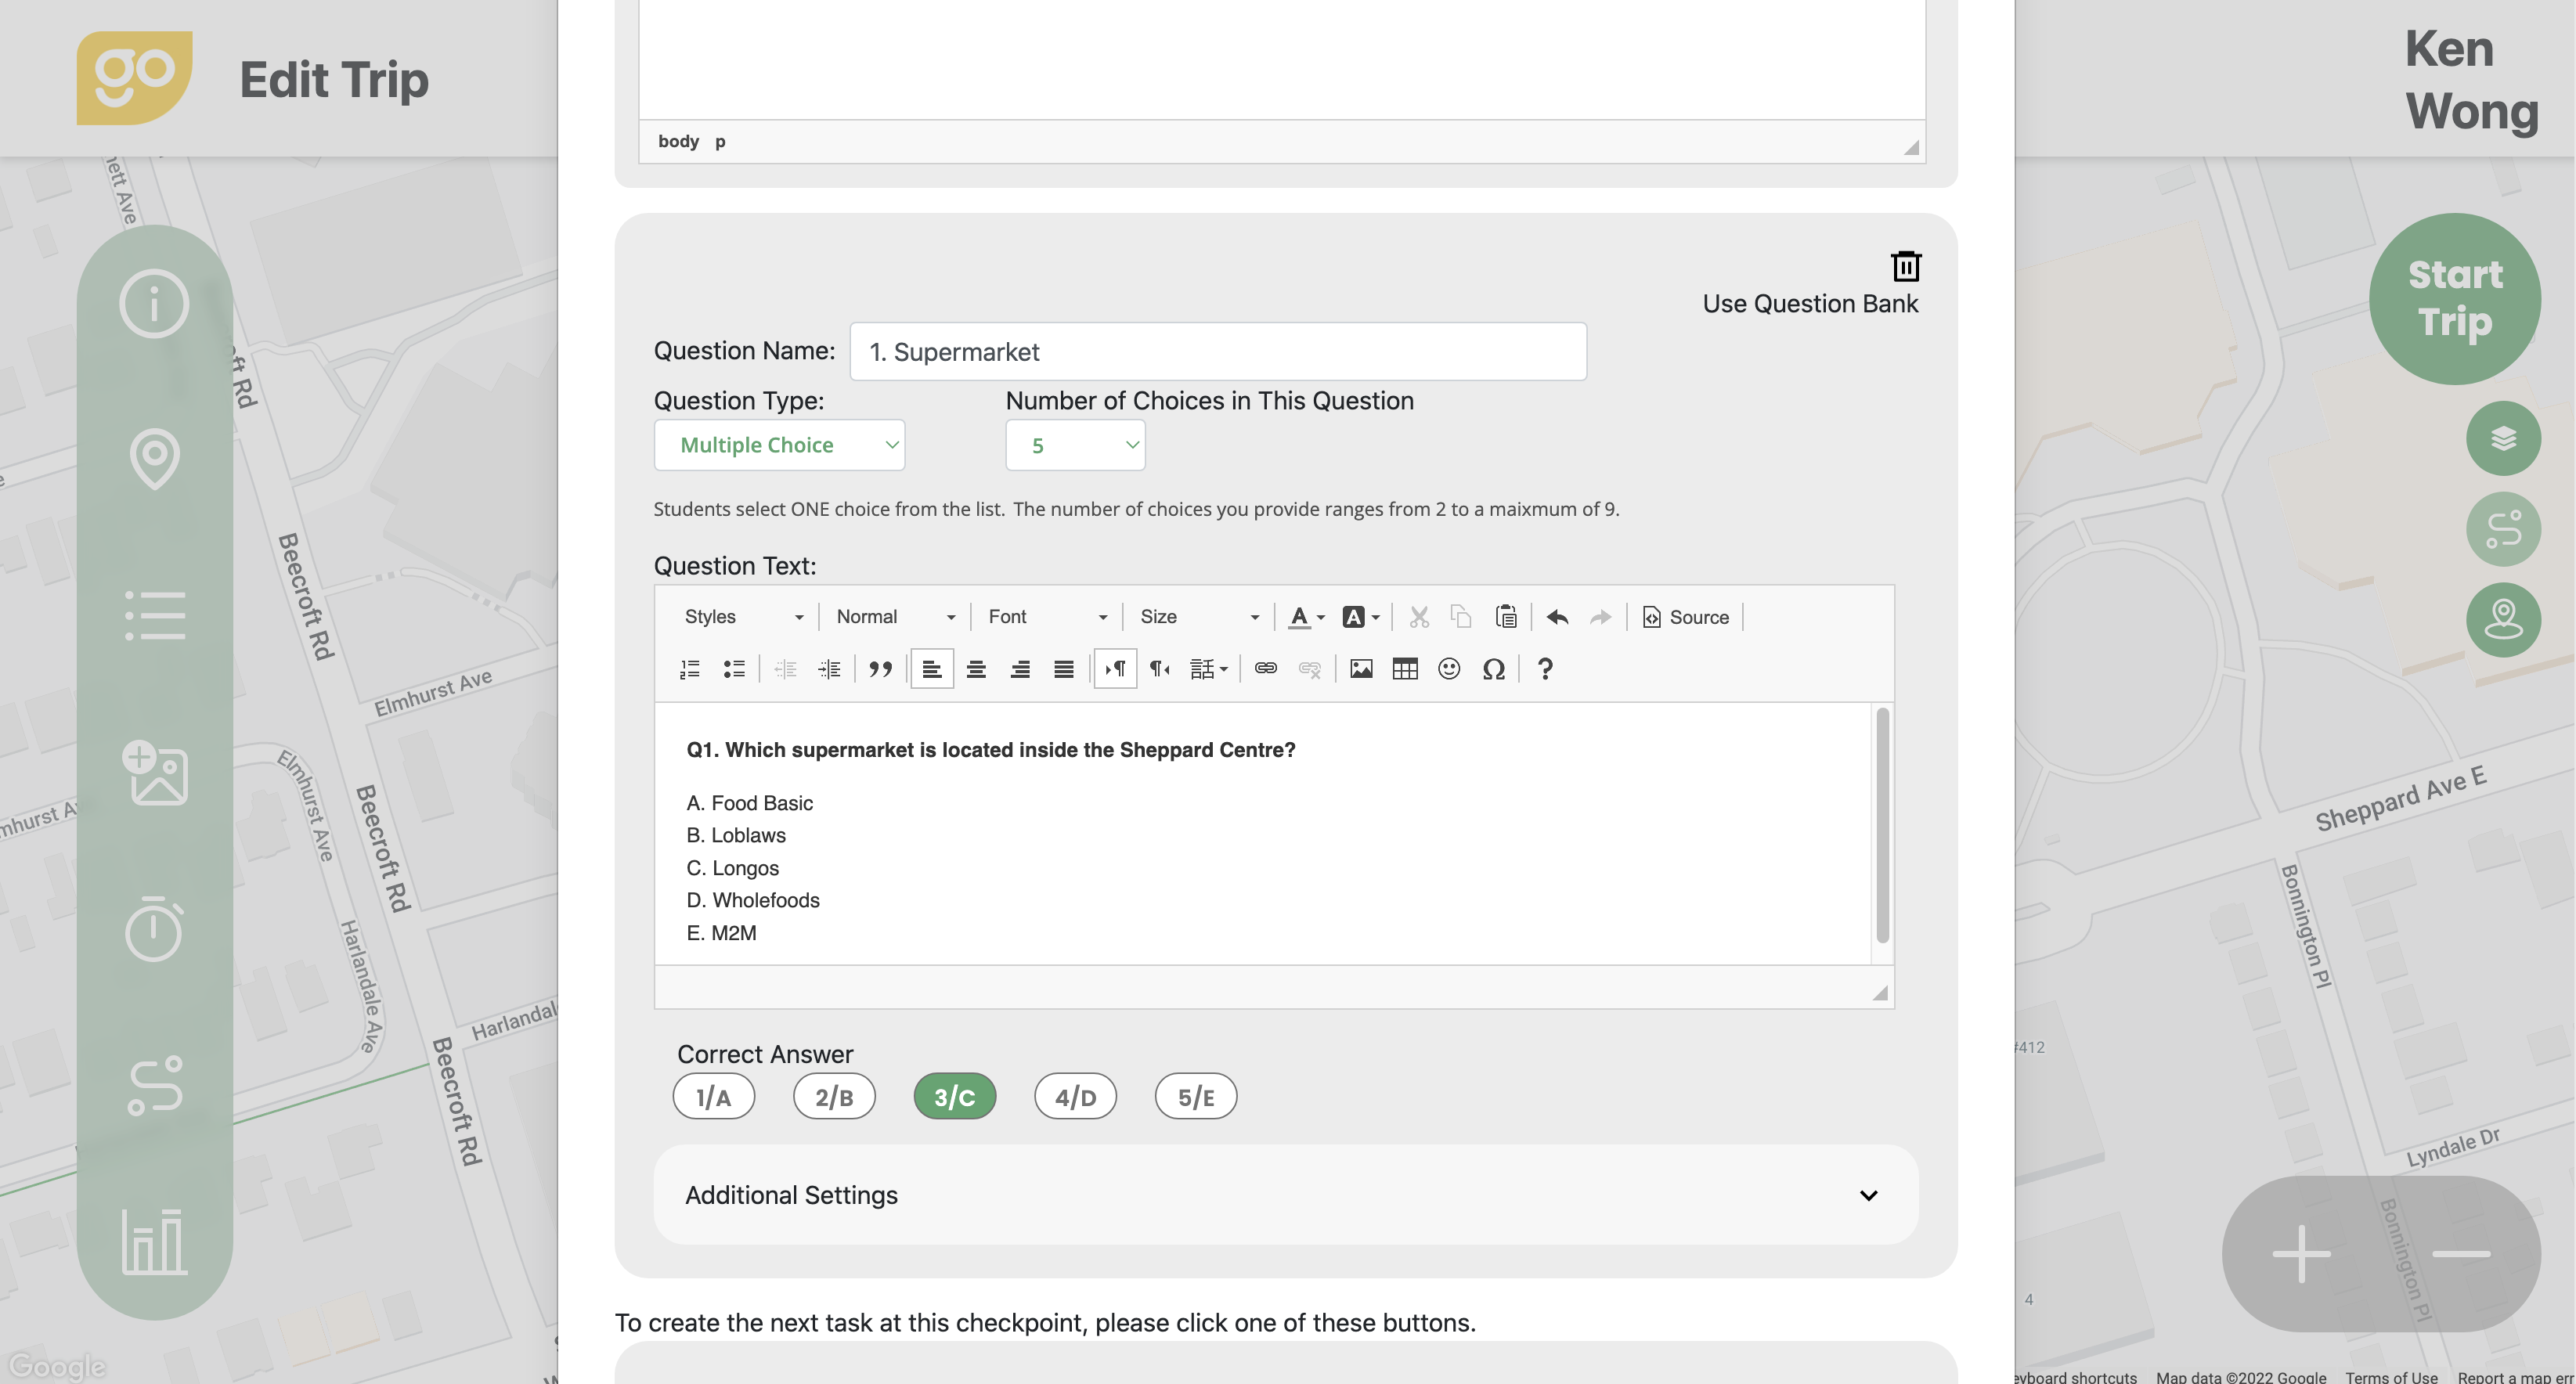

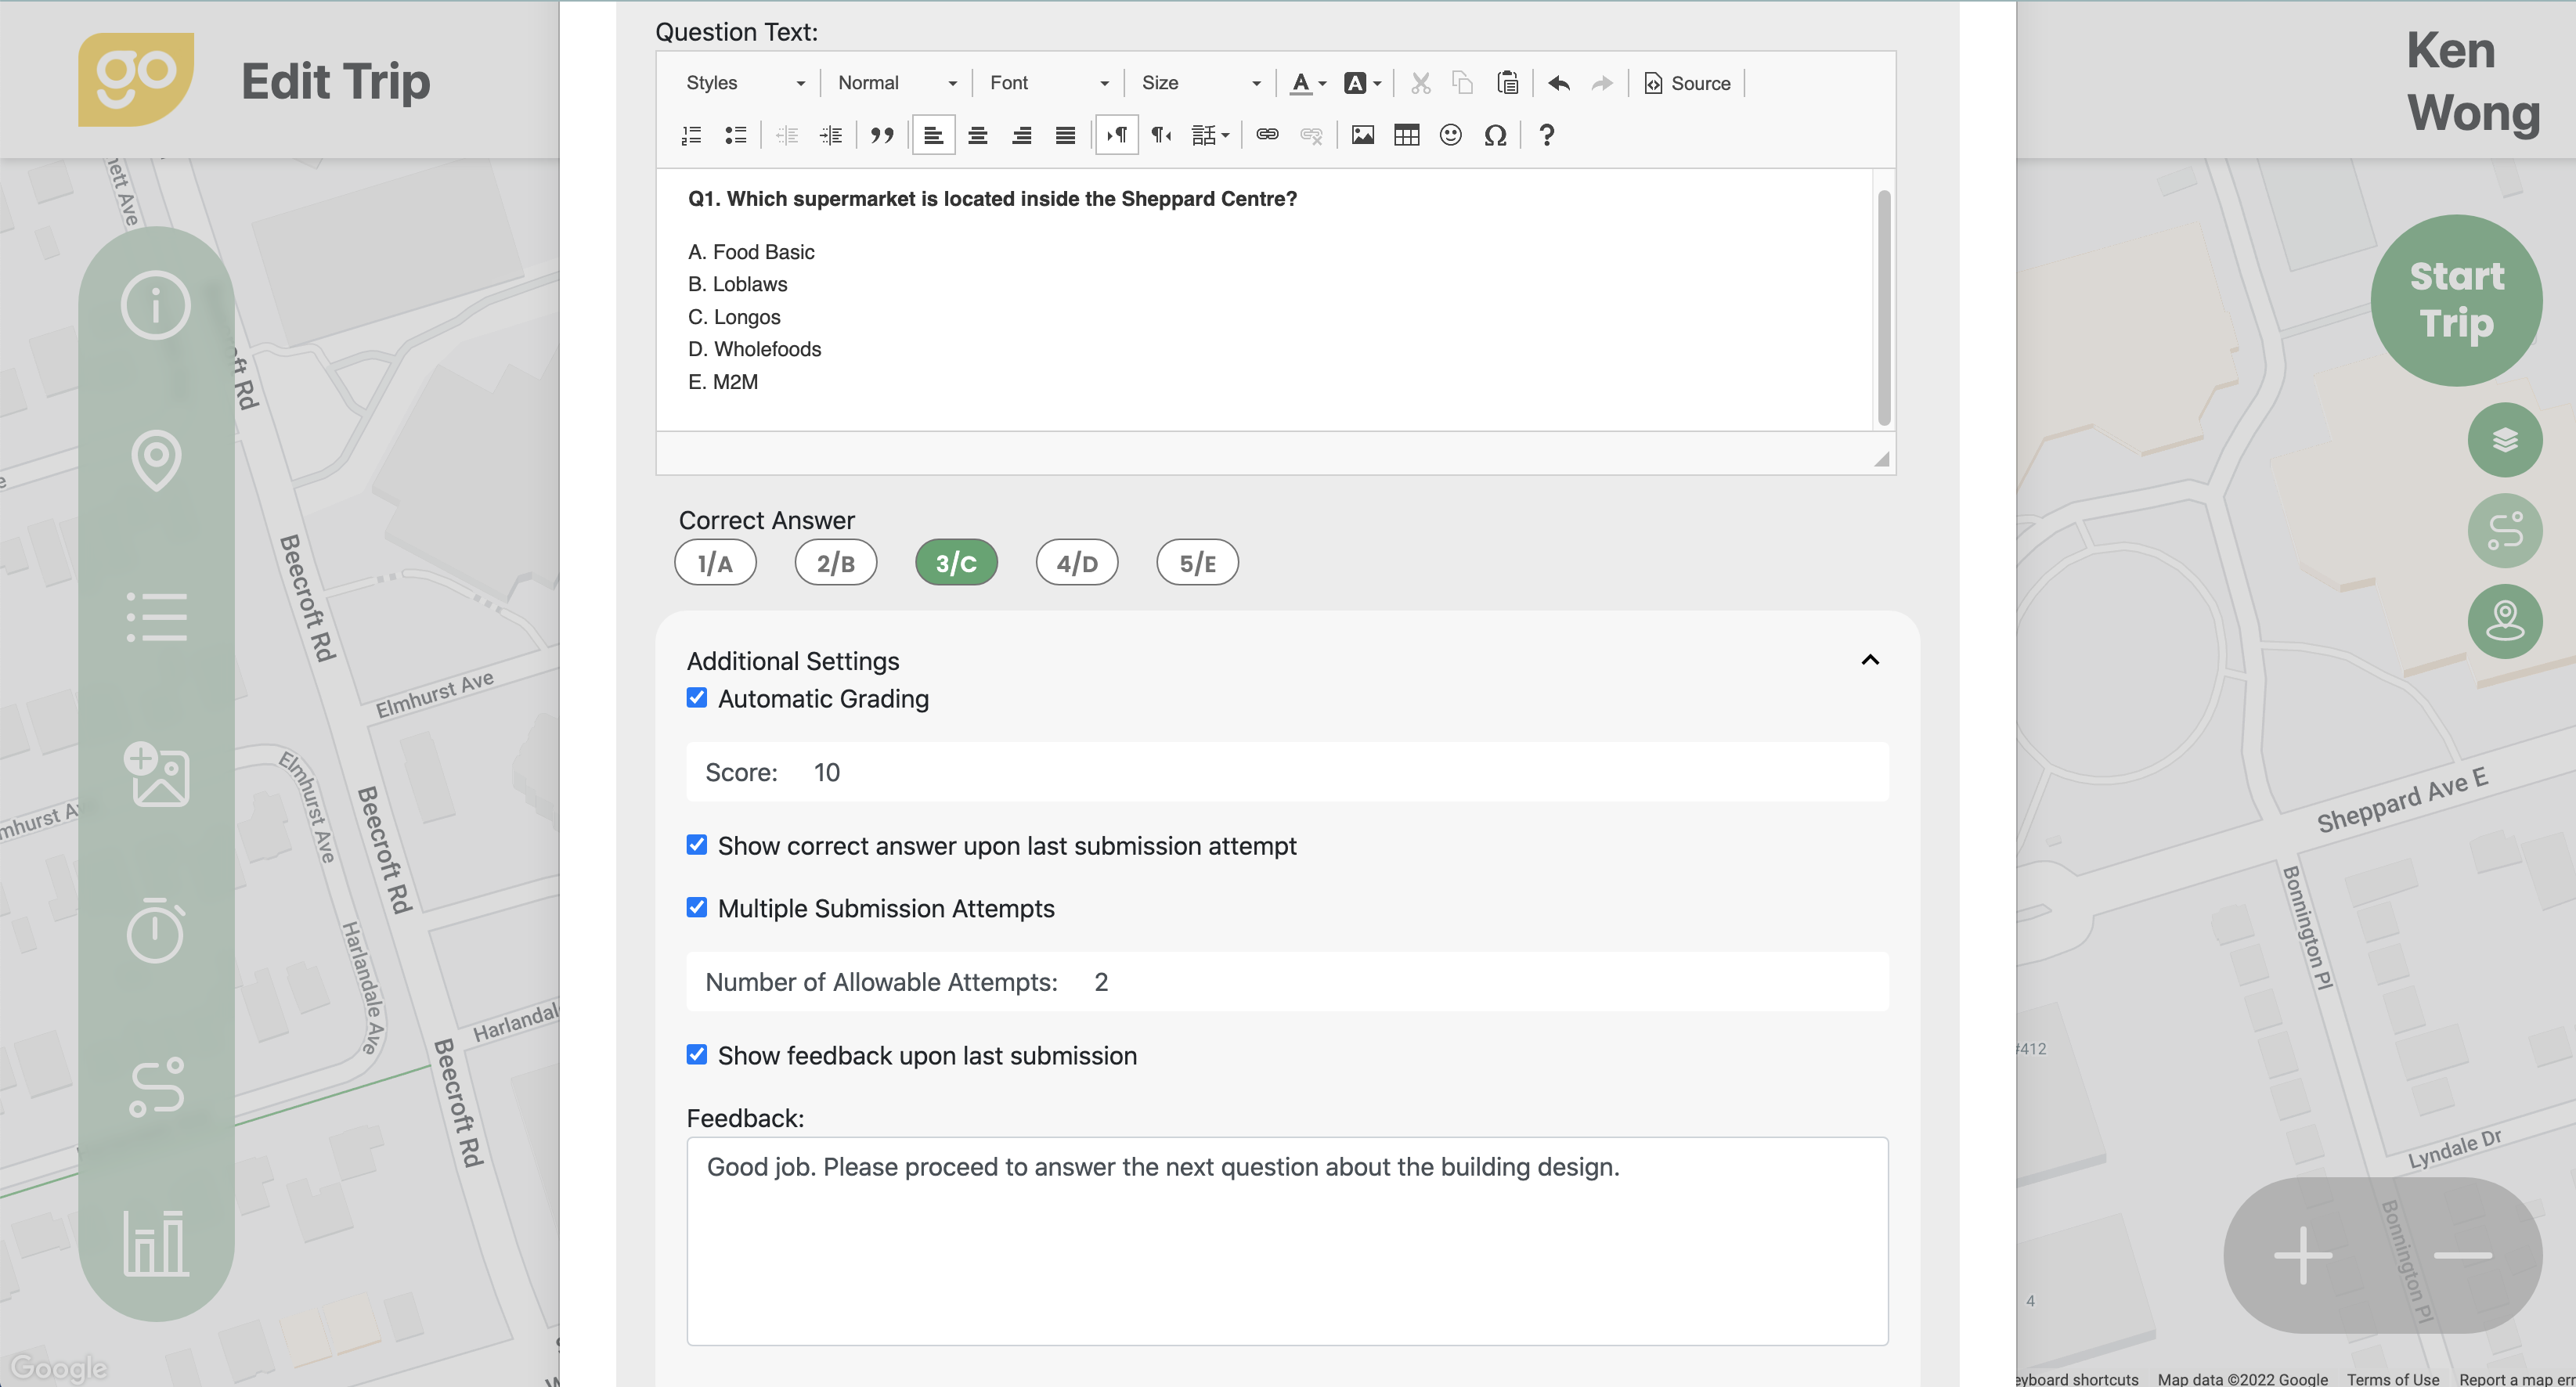
a. Some advanced functions can be set at this checkpoint. For example, if your question is in multiple-choice format, you can pre-define the correct answer and automatically give students scores (e.g., 10) if they answer the question correctly.
b. You can choose to show the correct answer upon last submission attempt.
c. You can decide whether you allow students to re-attempt the same question and set the maximal number of allowable attempts (e.g., 2).
d. You can show feedback or instructions upon last submission.
e. The proximity range indicates the distance from the checkpoint. The default is 50m. In locations where cellphone coverage is limited, you should have a large coverage area (e.g., 300-500m).
f. If you want to show text information at the checkpoint, select "Display Content" and type the text to be displayed.
g. Alternatively, you can create your message in a Word Processor and then copy-and-paste the content there. The text area accepts formatting and insertion of multi-media files.
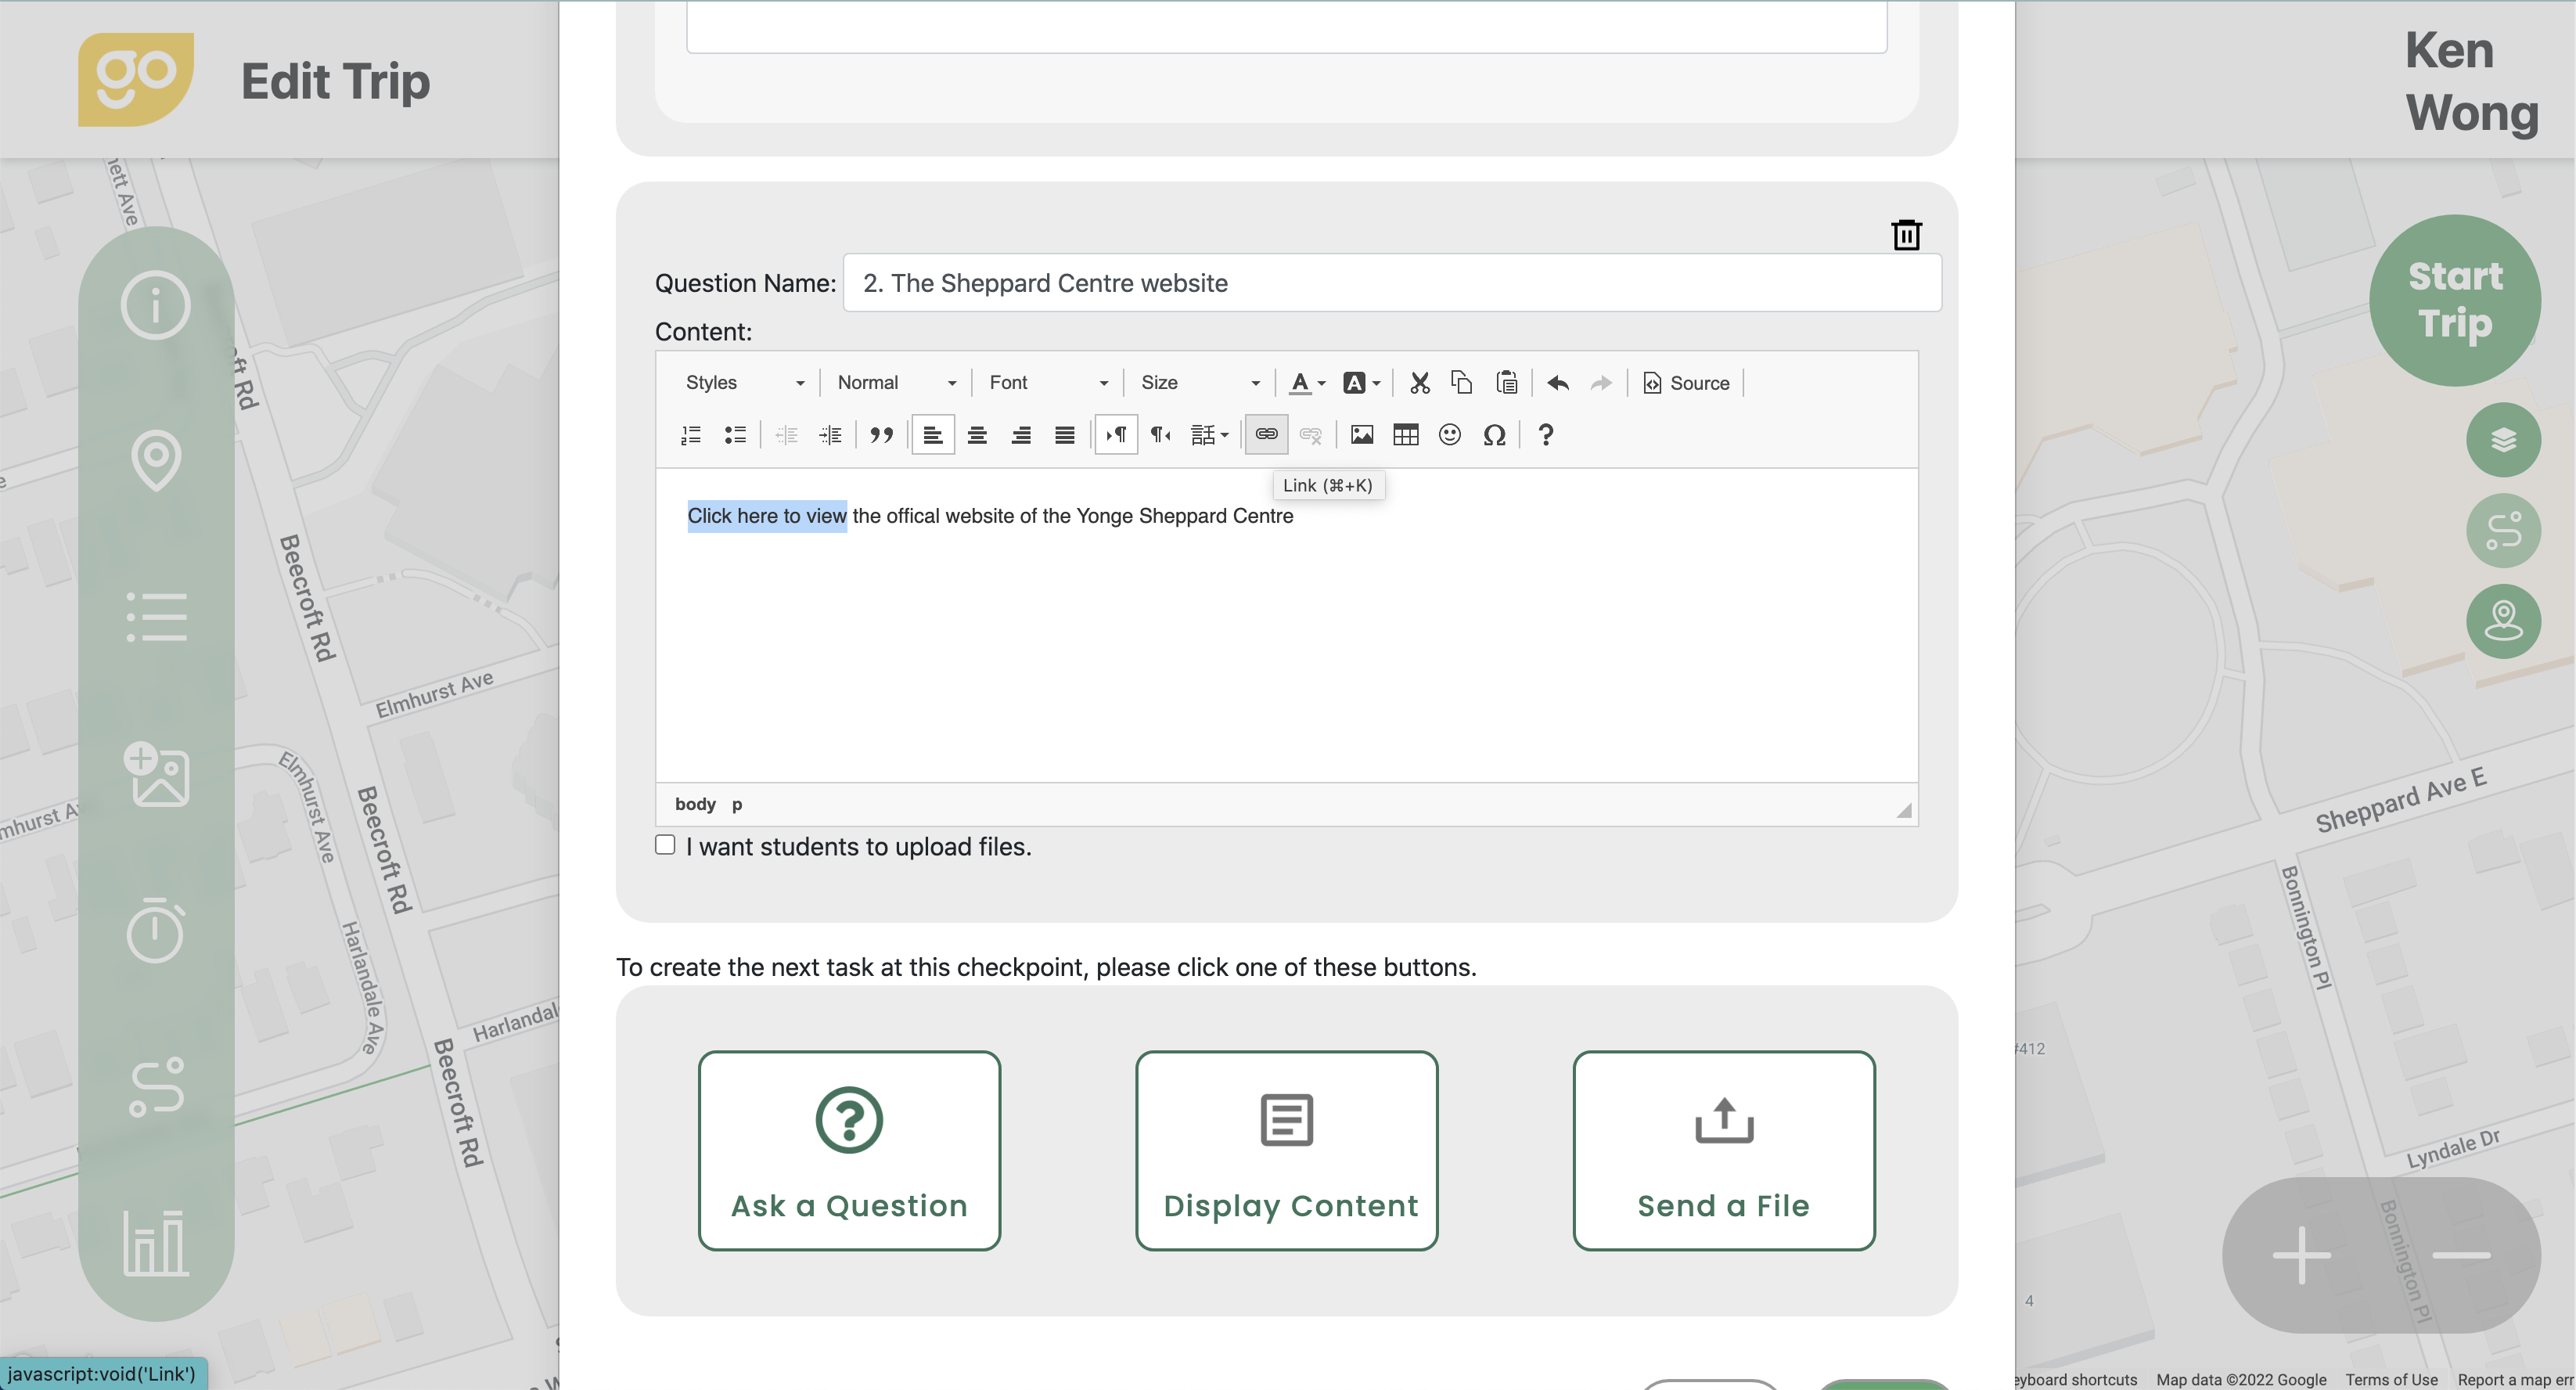
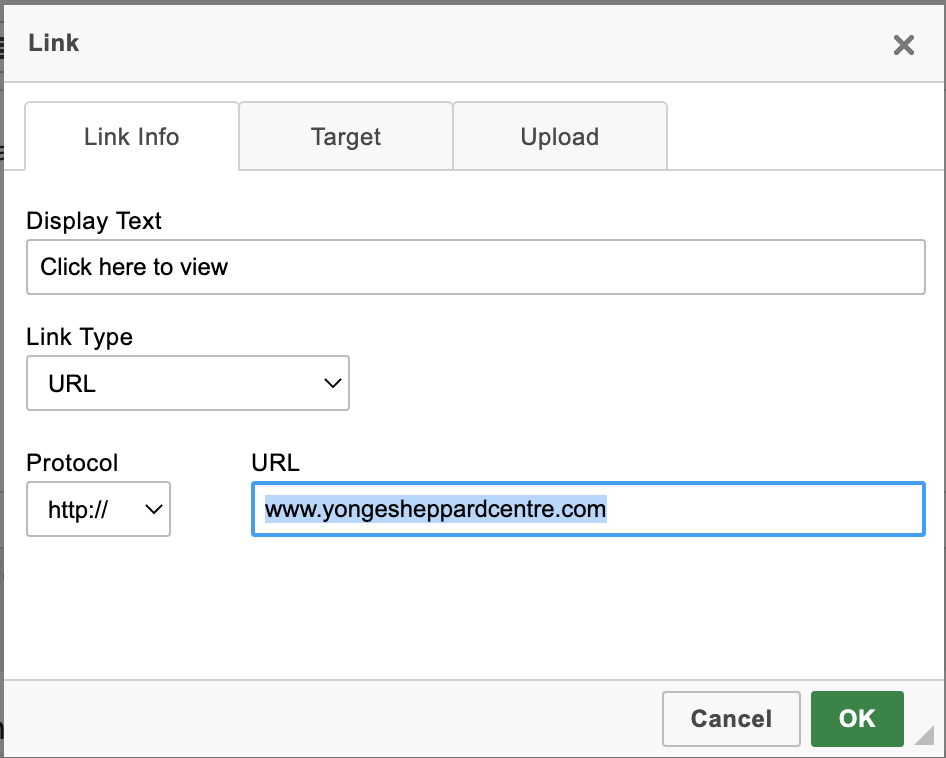
h. If you want to show a webpage at the checkpoint, select "Display Content" and then highlight the text and click the "Link" icon in the menu bar. Enter the URL that you want students to view there and press "OK" and then "Next".
i. If you want students to receive and view a file at the checkpoint, select "Send a file" and click "Browse" to locate your file from your computer. Name your file and also indicate the file type (e.g., Image).
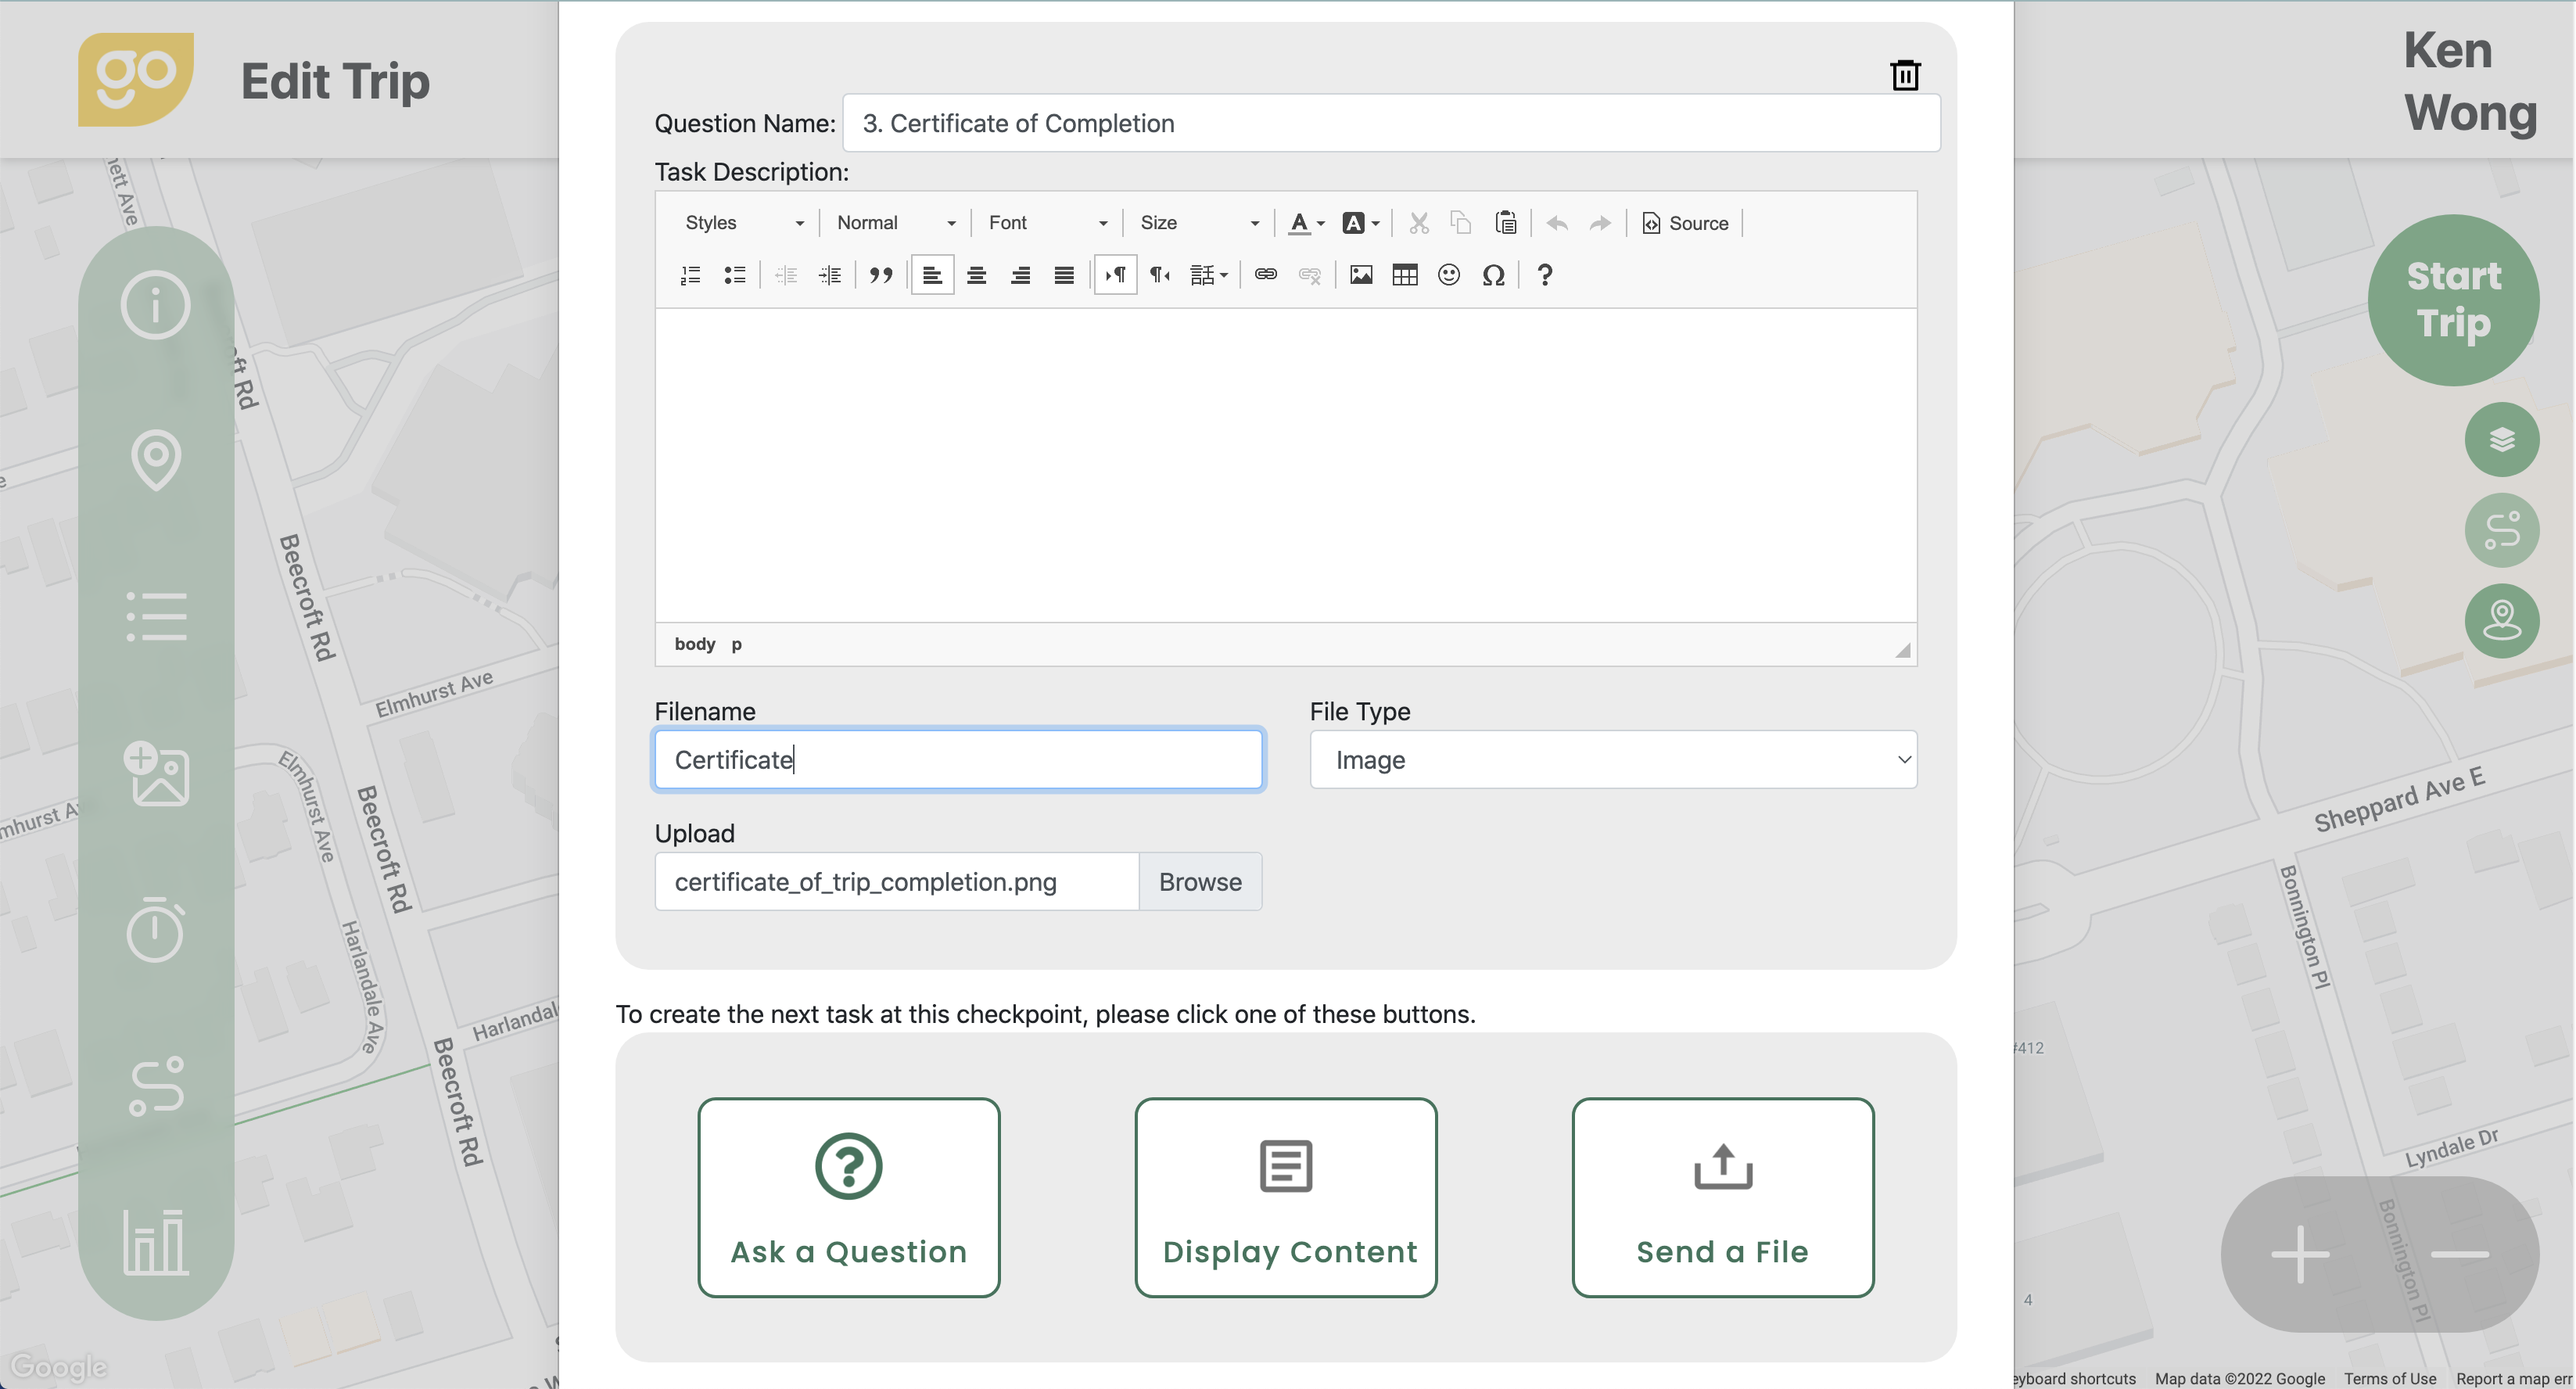
j. Note that you can have multiple tasks or questions in each checkpoint. Just press one of the 3 buttons to create the next task/question. Remember to press the "Save" button after it's done.
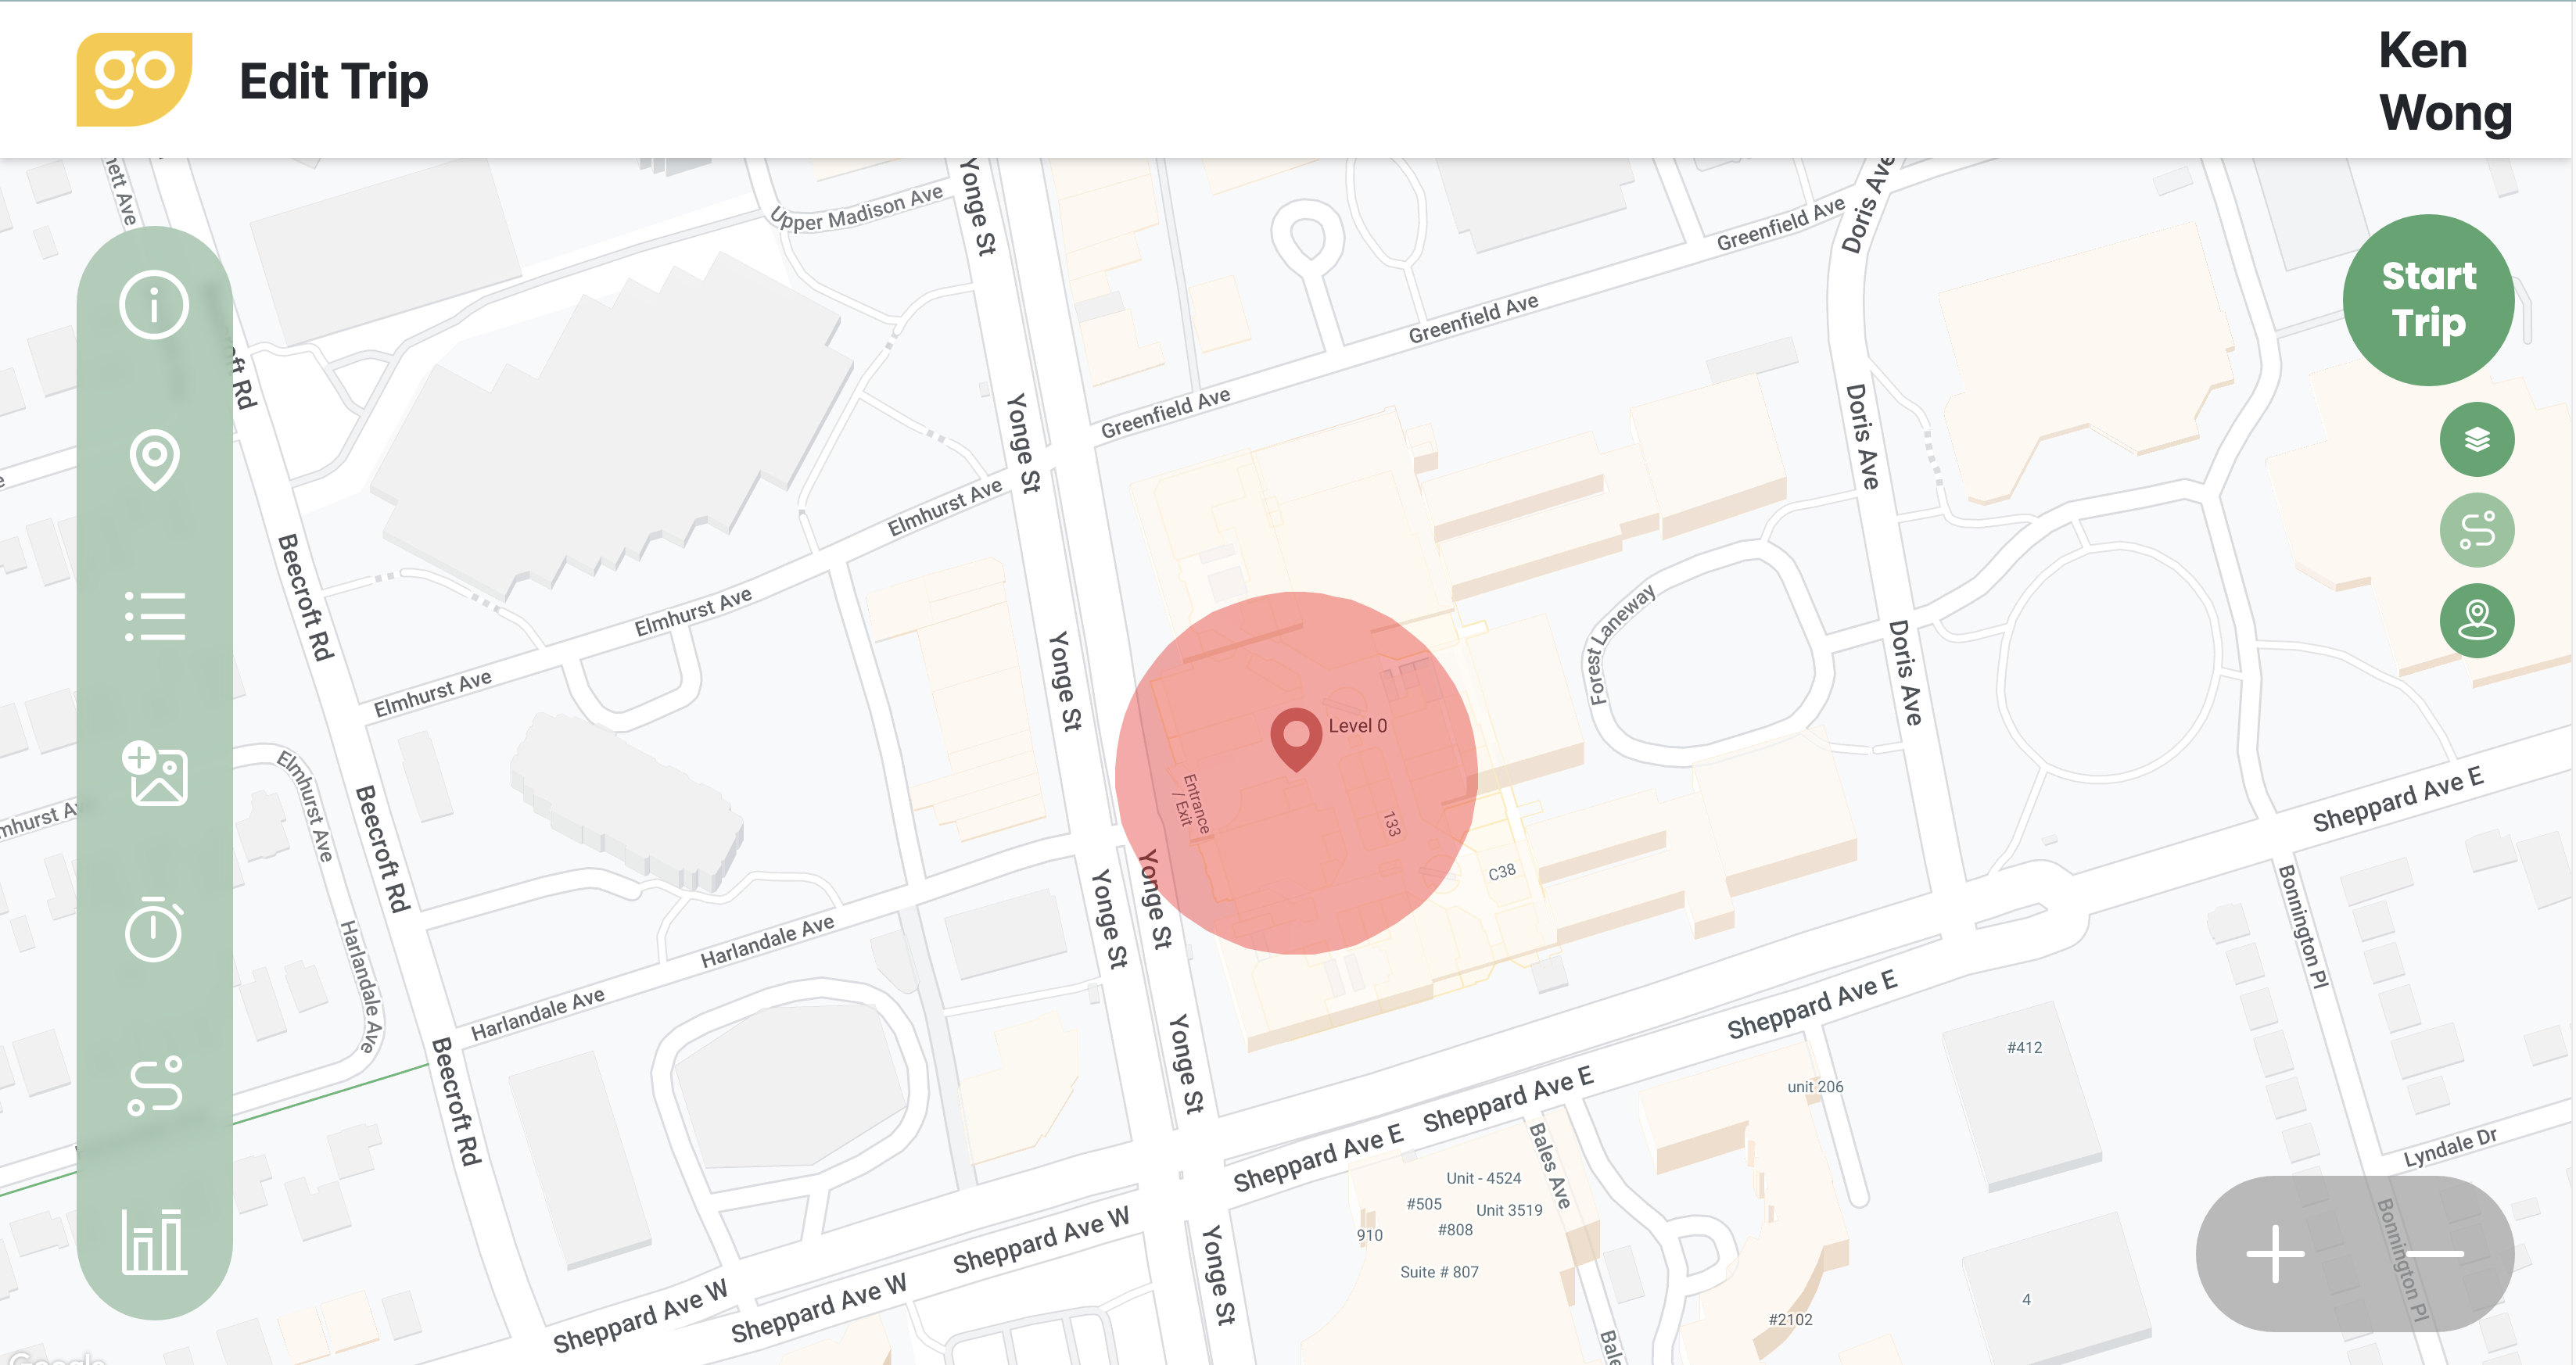
k. Once the first checkpoint is defined, a map with the red coverage area will be shown.

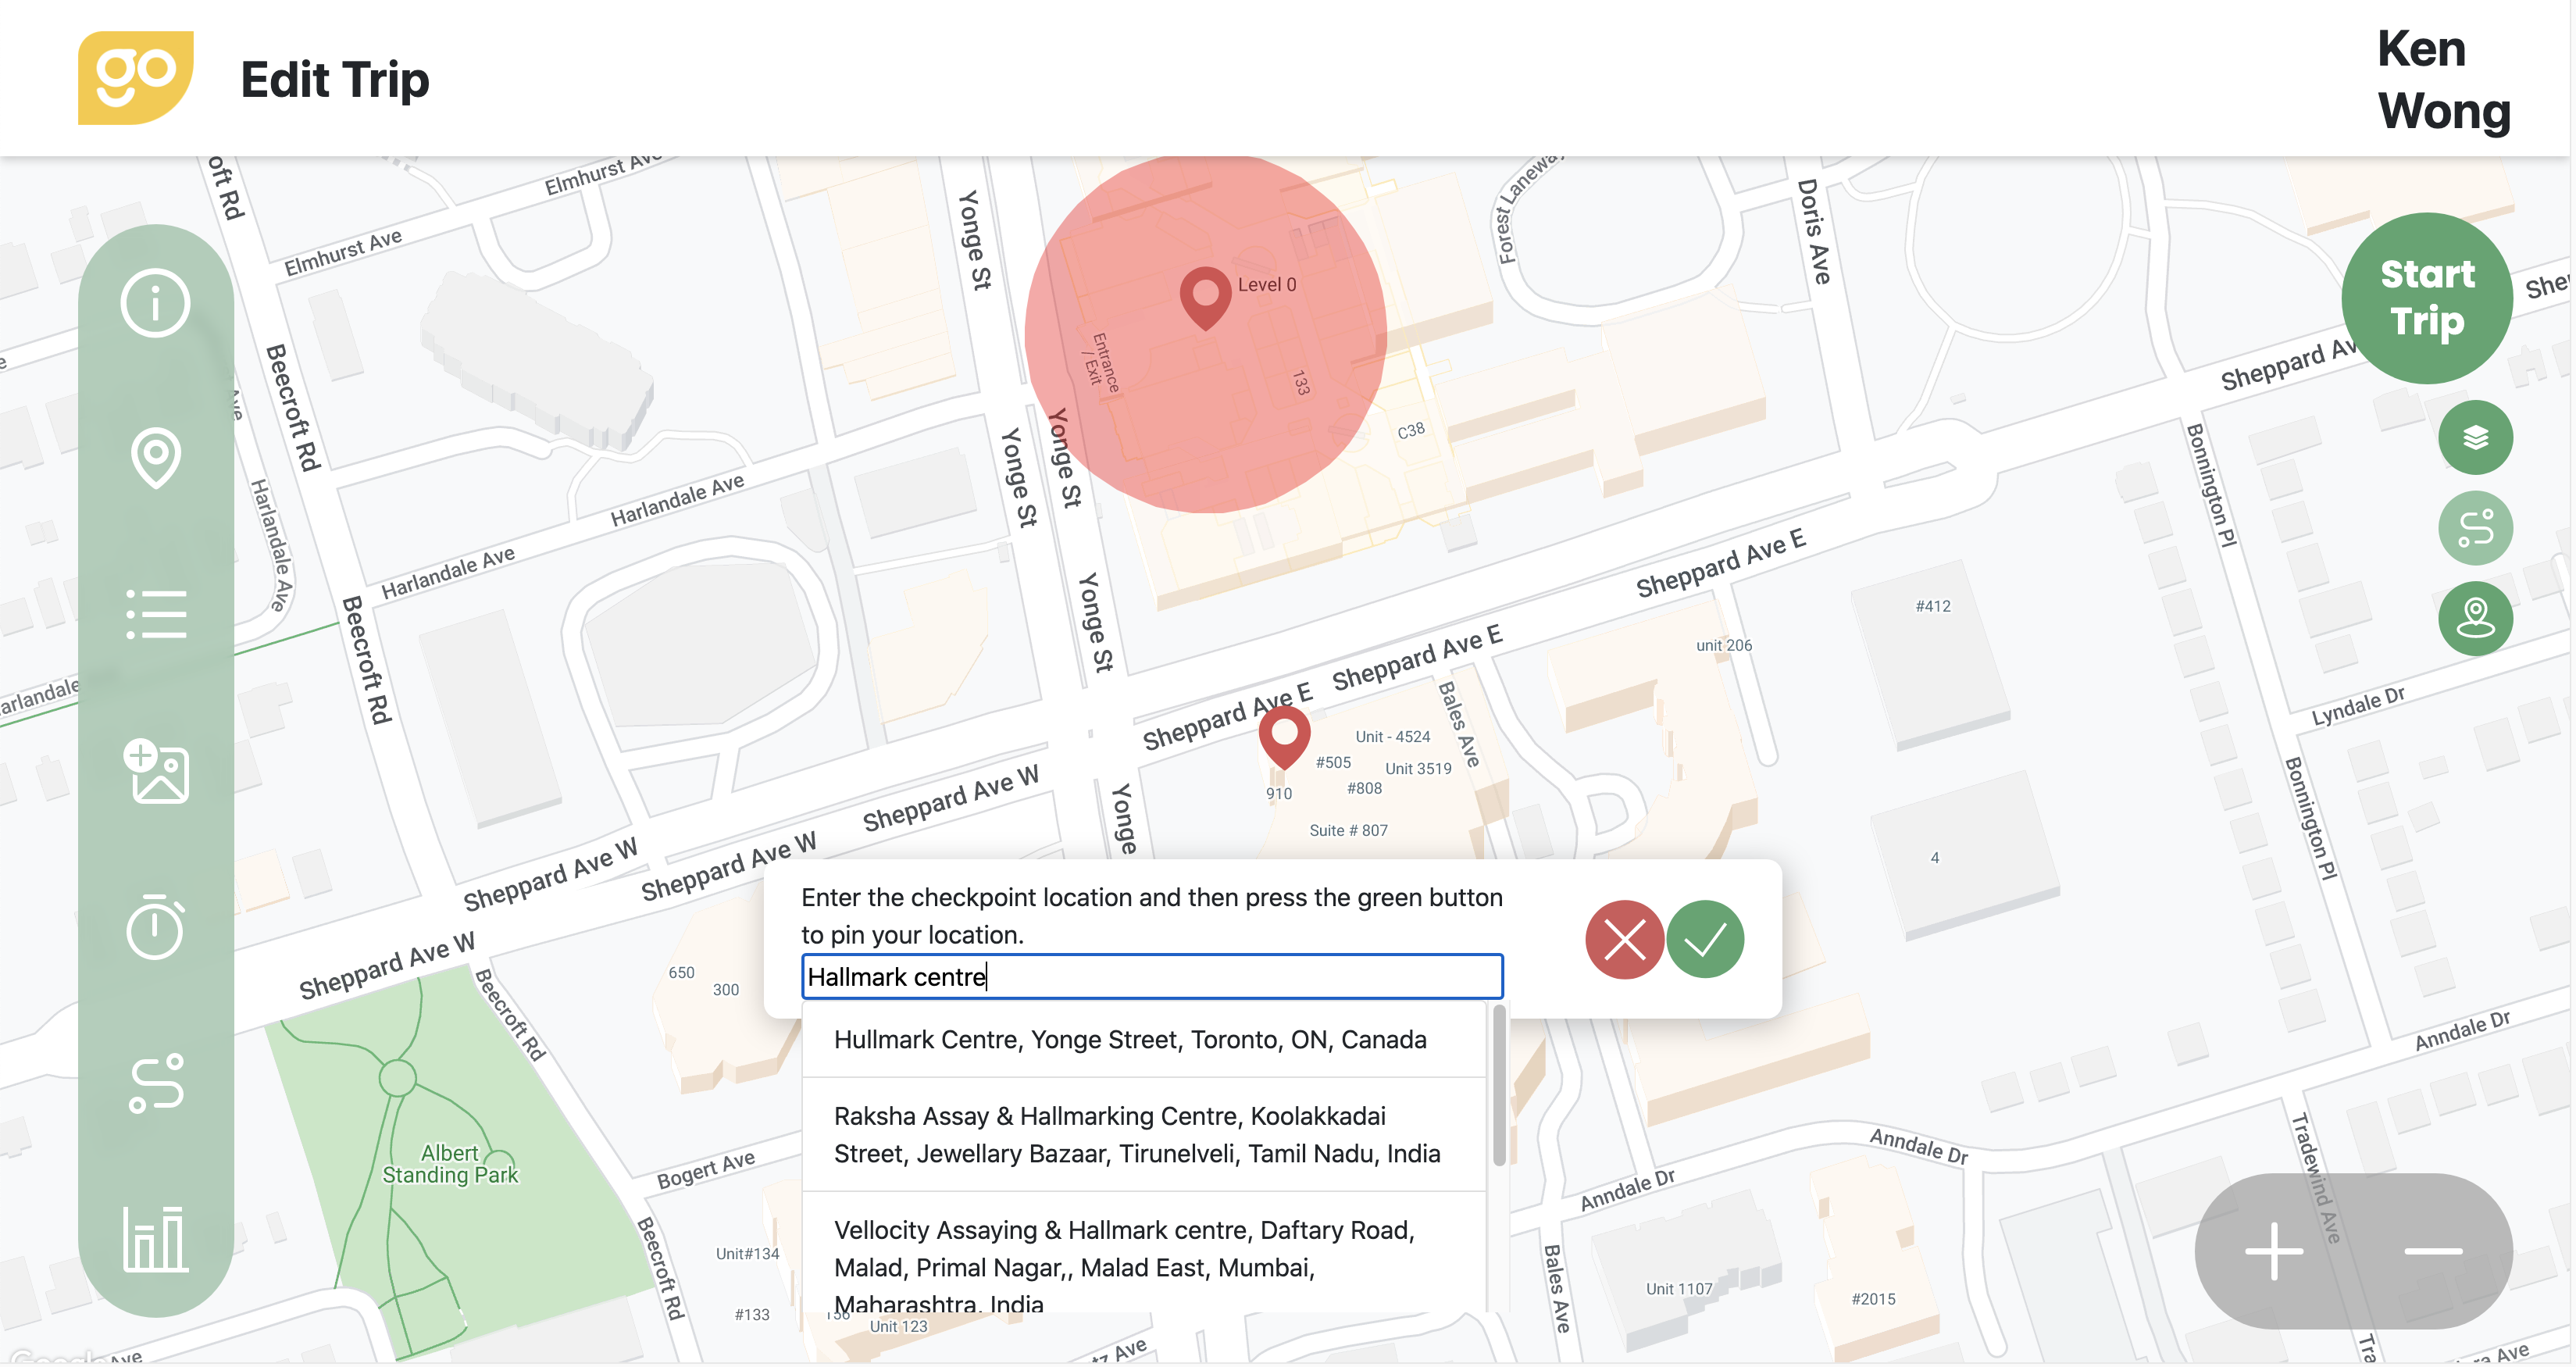
a. To set up the 2nd checkpoint, click the 2nd icon again to enter your checkpoint location and then press the green tick button to pin it on the map (e.g., Hallmark centre). Follow the same process as mentioned above to create your tasks and questions.
b. To modify a checkpoint that you've already created, click the 3rd button in the menu bar, select "..." of your checkpoint and "Edit".
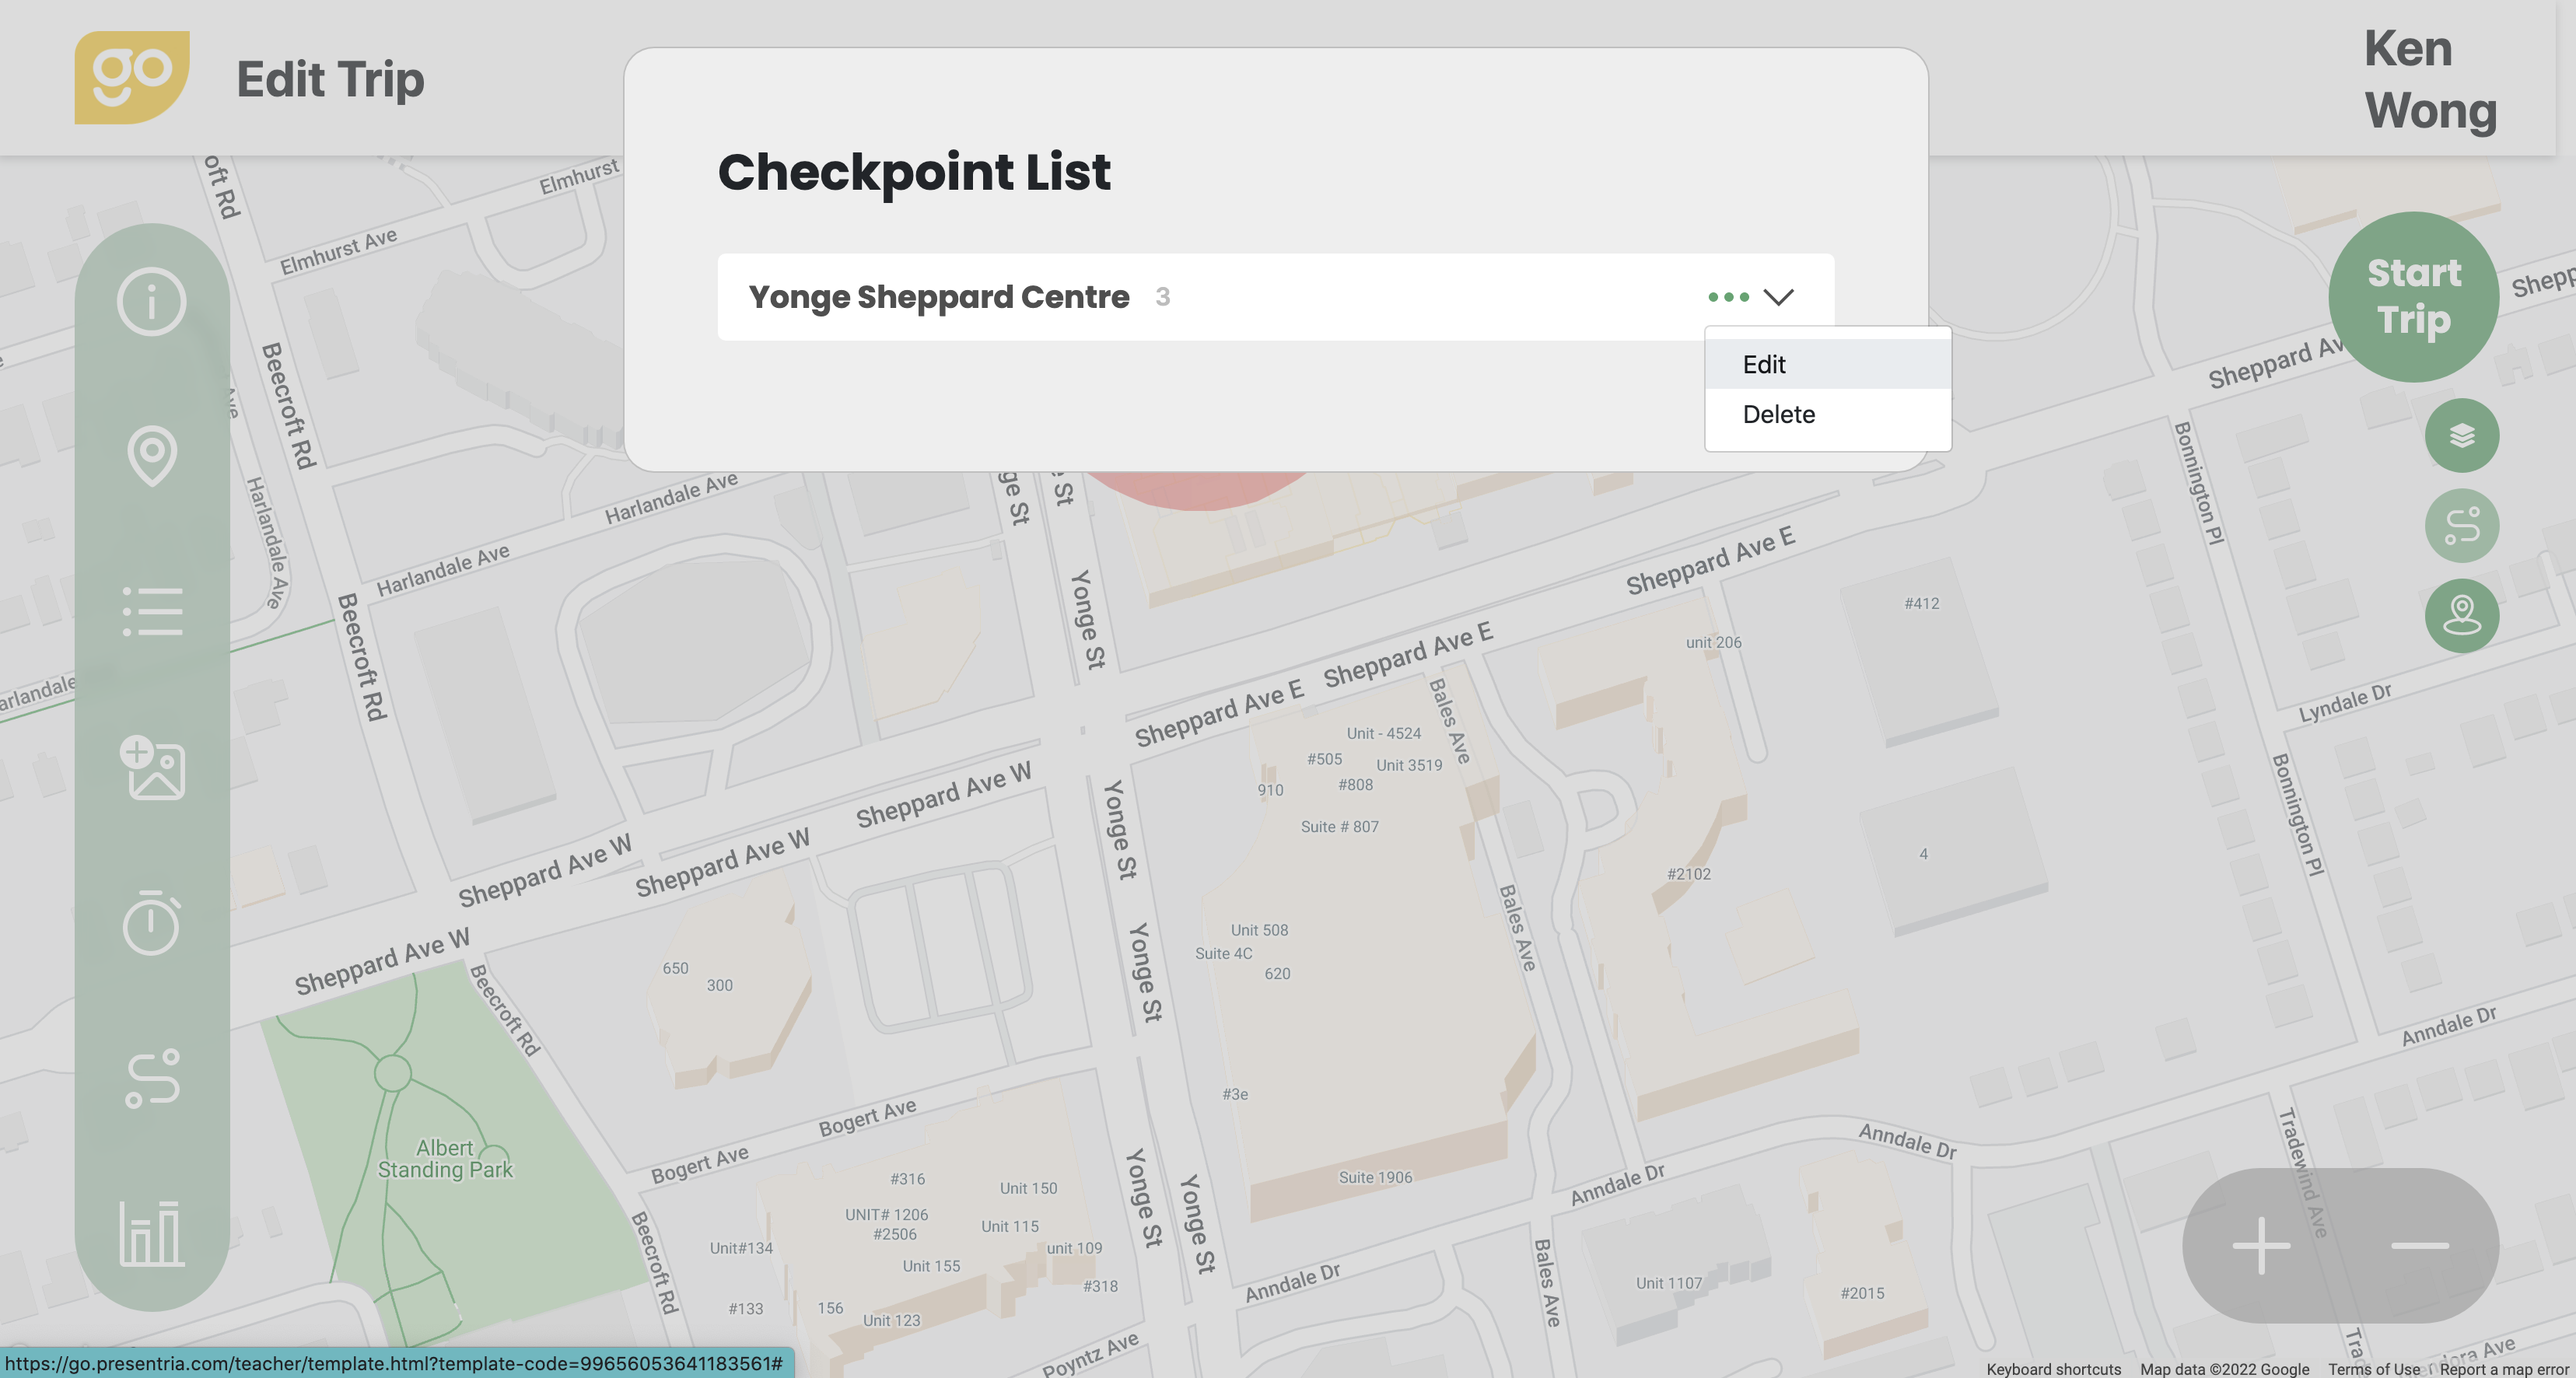
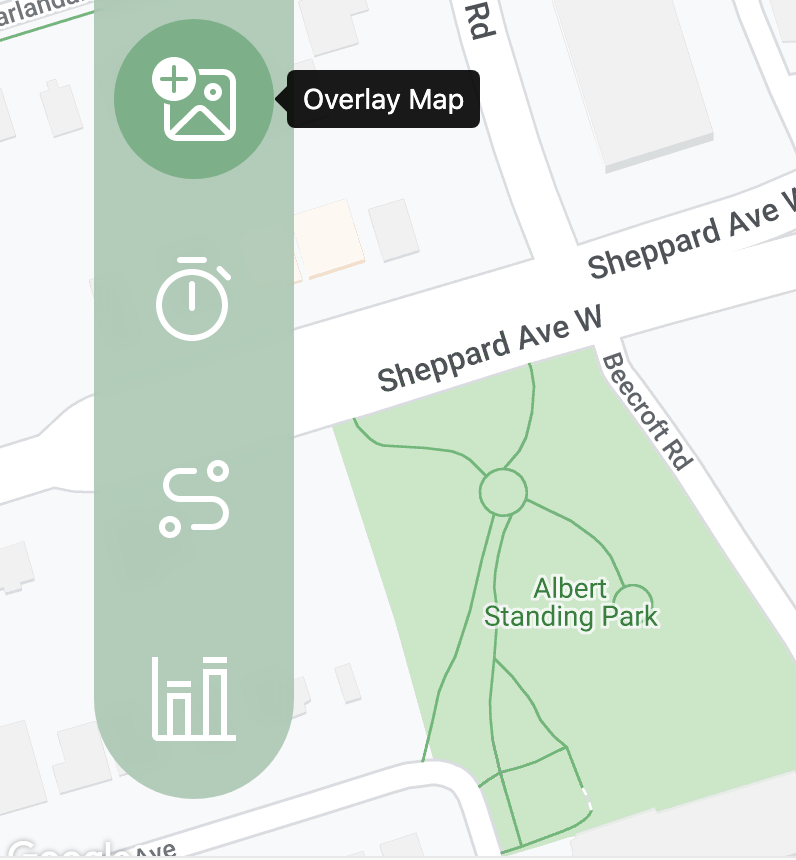
 a. There are some advanced functions for this version of Presentria GO. For example:
-
-
-
-
- Overlay Map
- Time Sequence
- Task Sequence
- Score Sequence
-
-
-

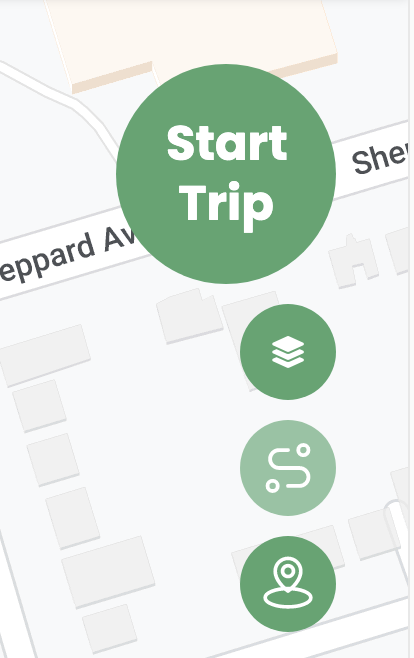
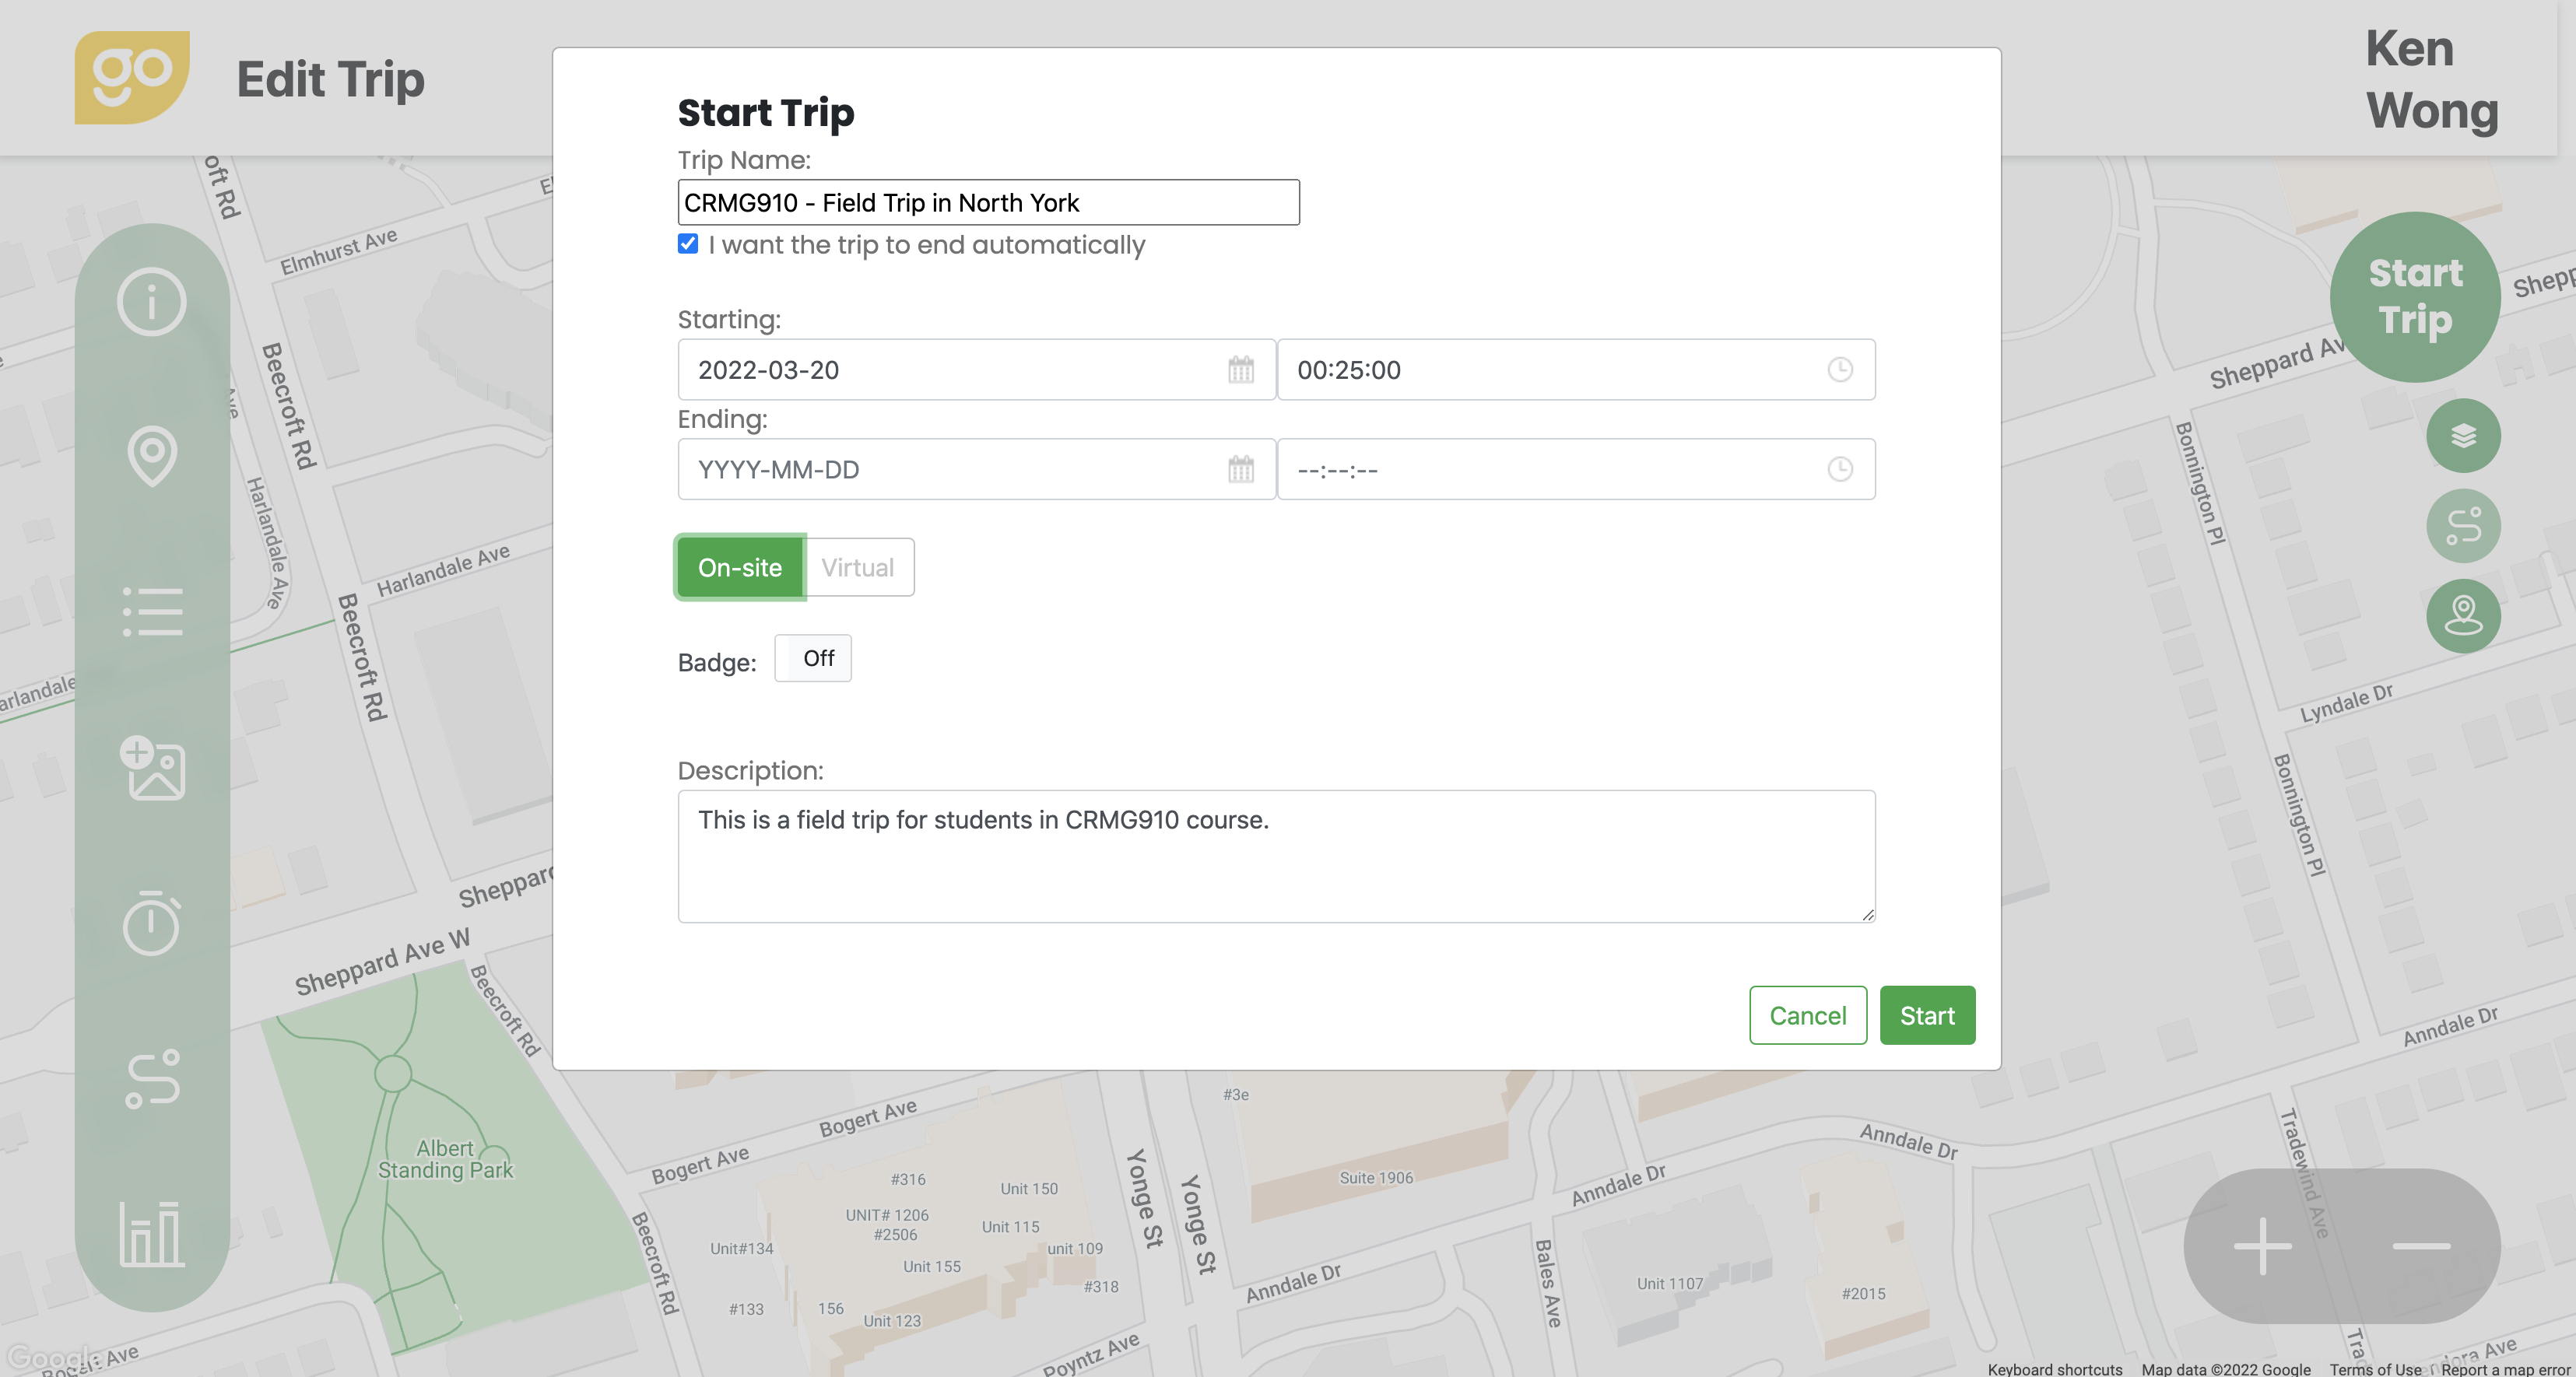
a. When you are ready to start the trip, press the "Start Trip" icon in the upper right-hand corner.
b. Configure the starting date and time. You can optionally configure to end this trip automatically after certain date and time.
c. If you want students to physically visit these checkpoints, select "On-site". If you have students who are residing in other cities, you can still engage them by asking them to visit these checkpoint virtually from their computers. In this case, you should select "Virtual".
d. Once you are ready to launch such an experiential trip, press the "Start" button. The system will generate the session code (e.g., G1131) for you to give students.
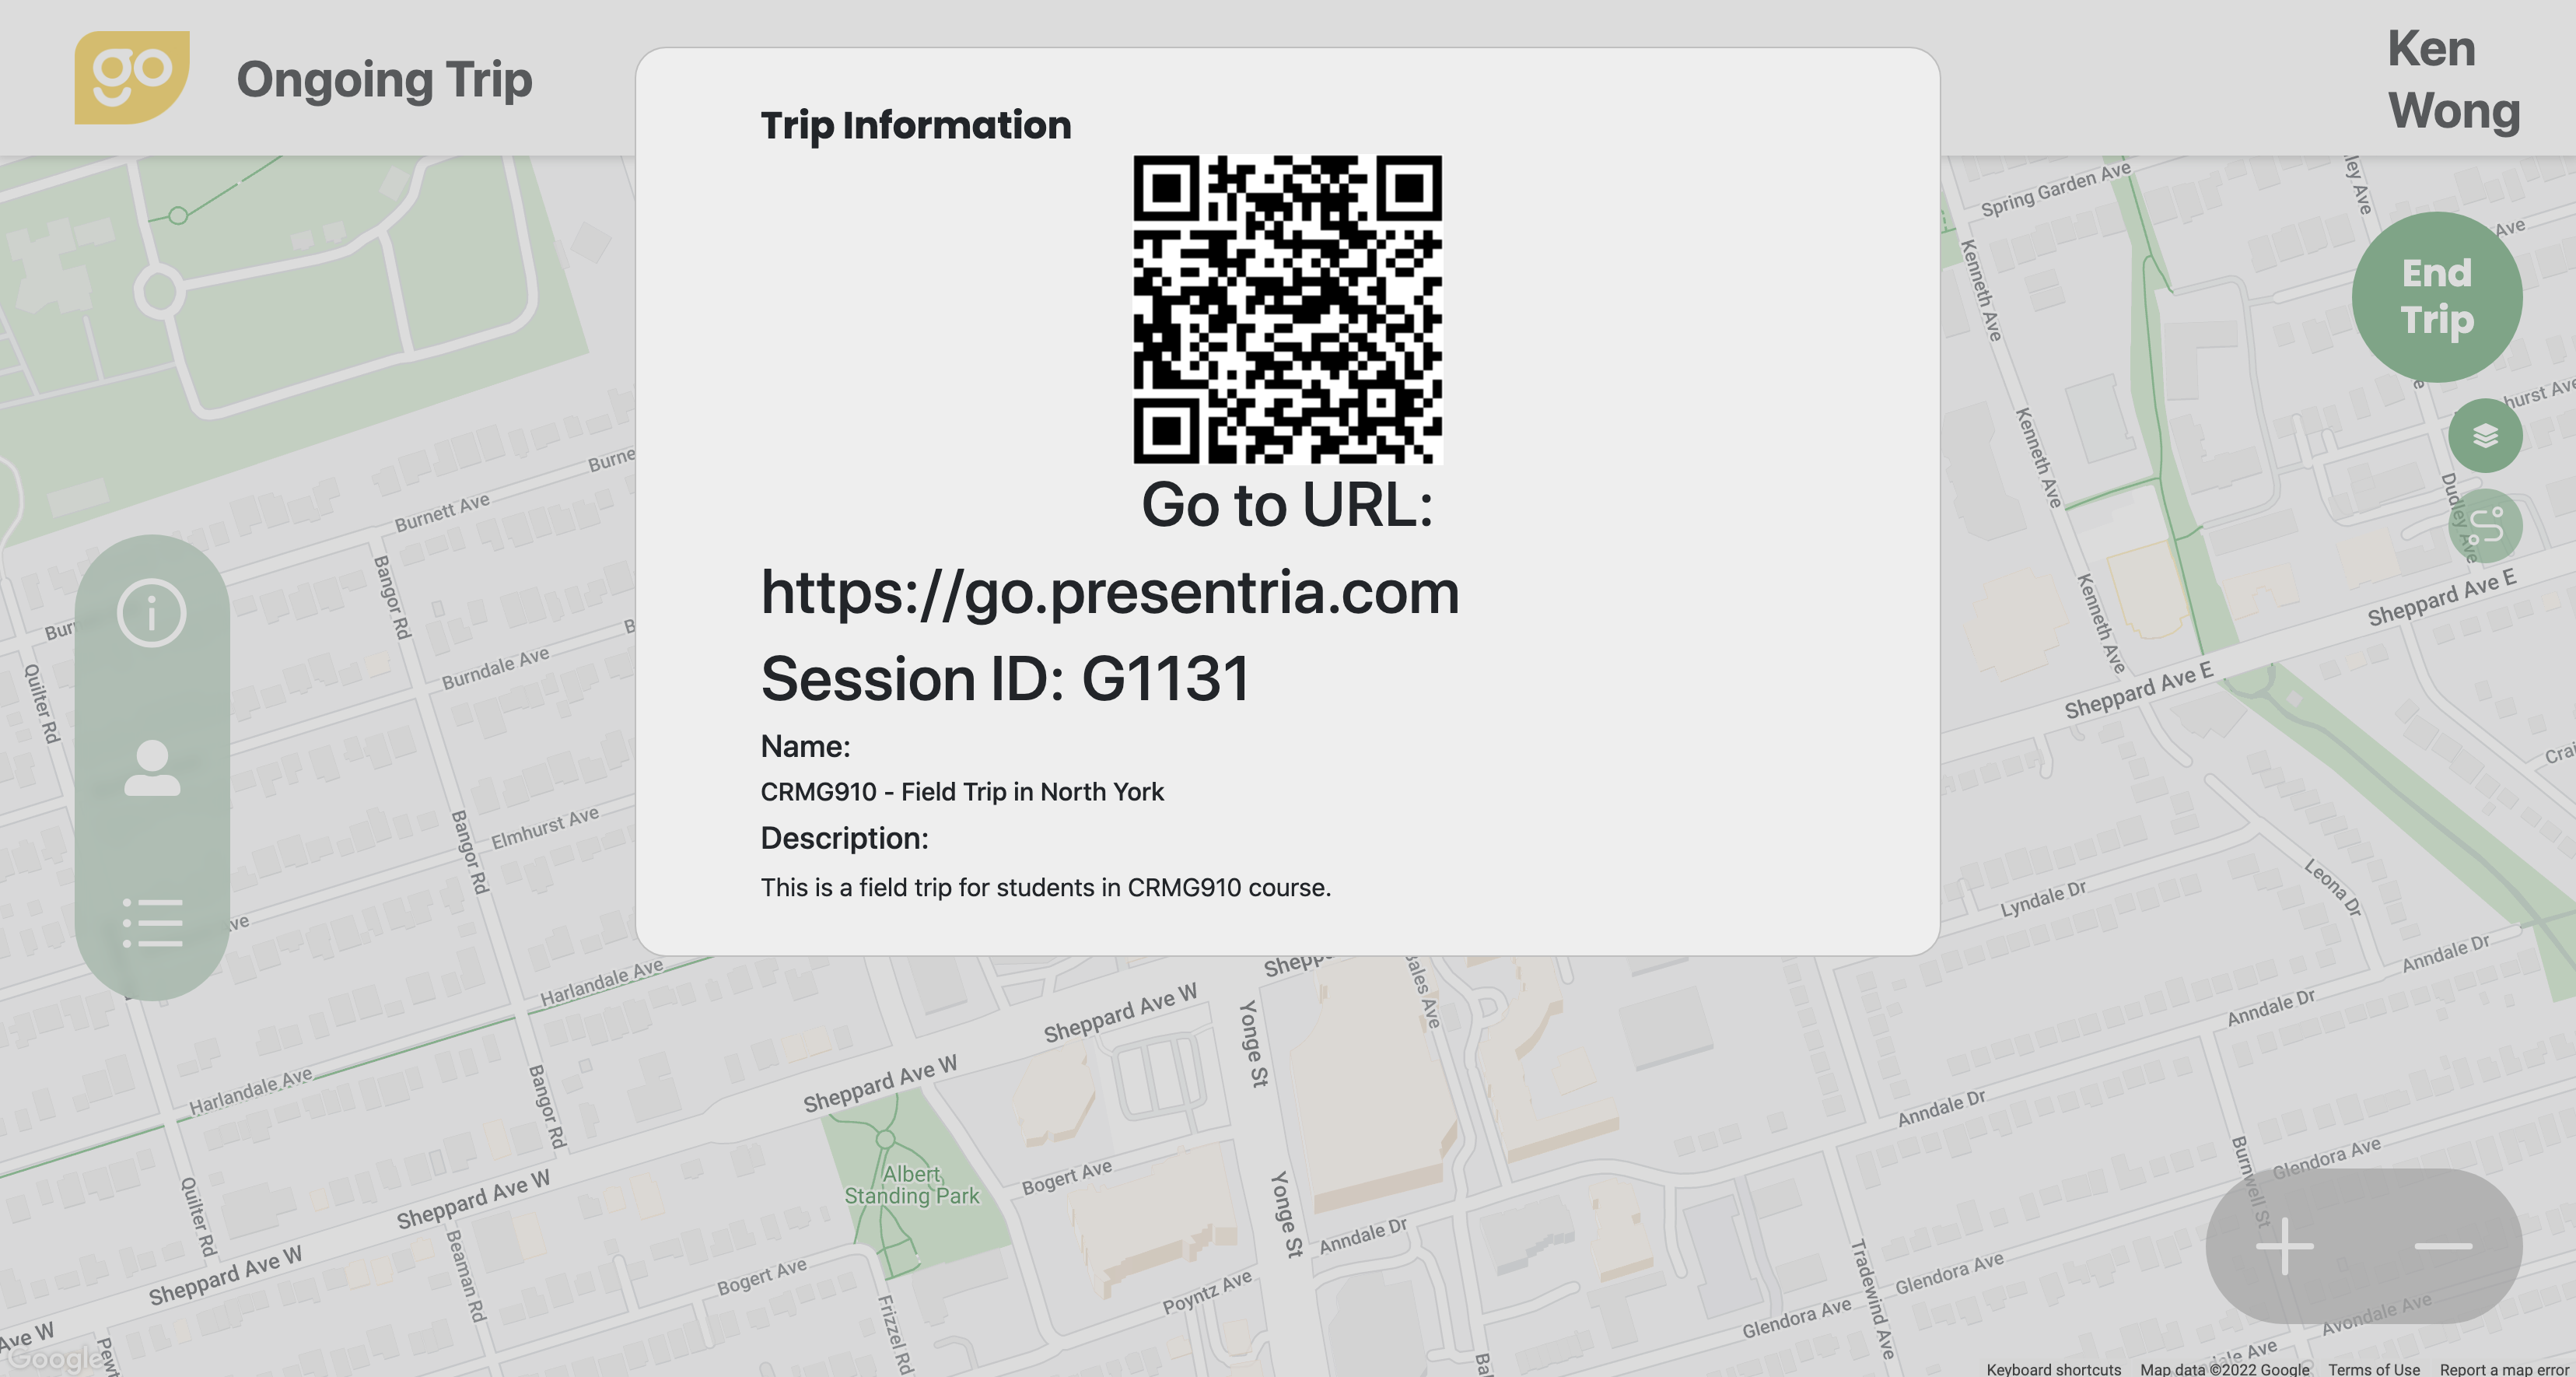
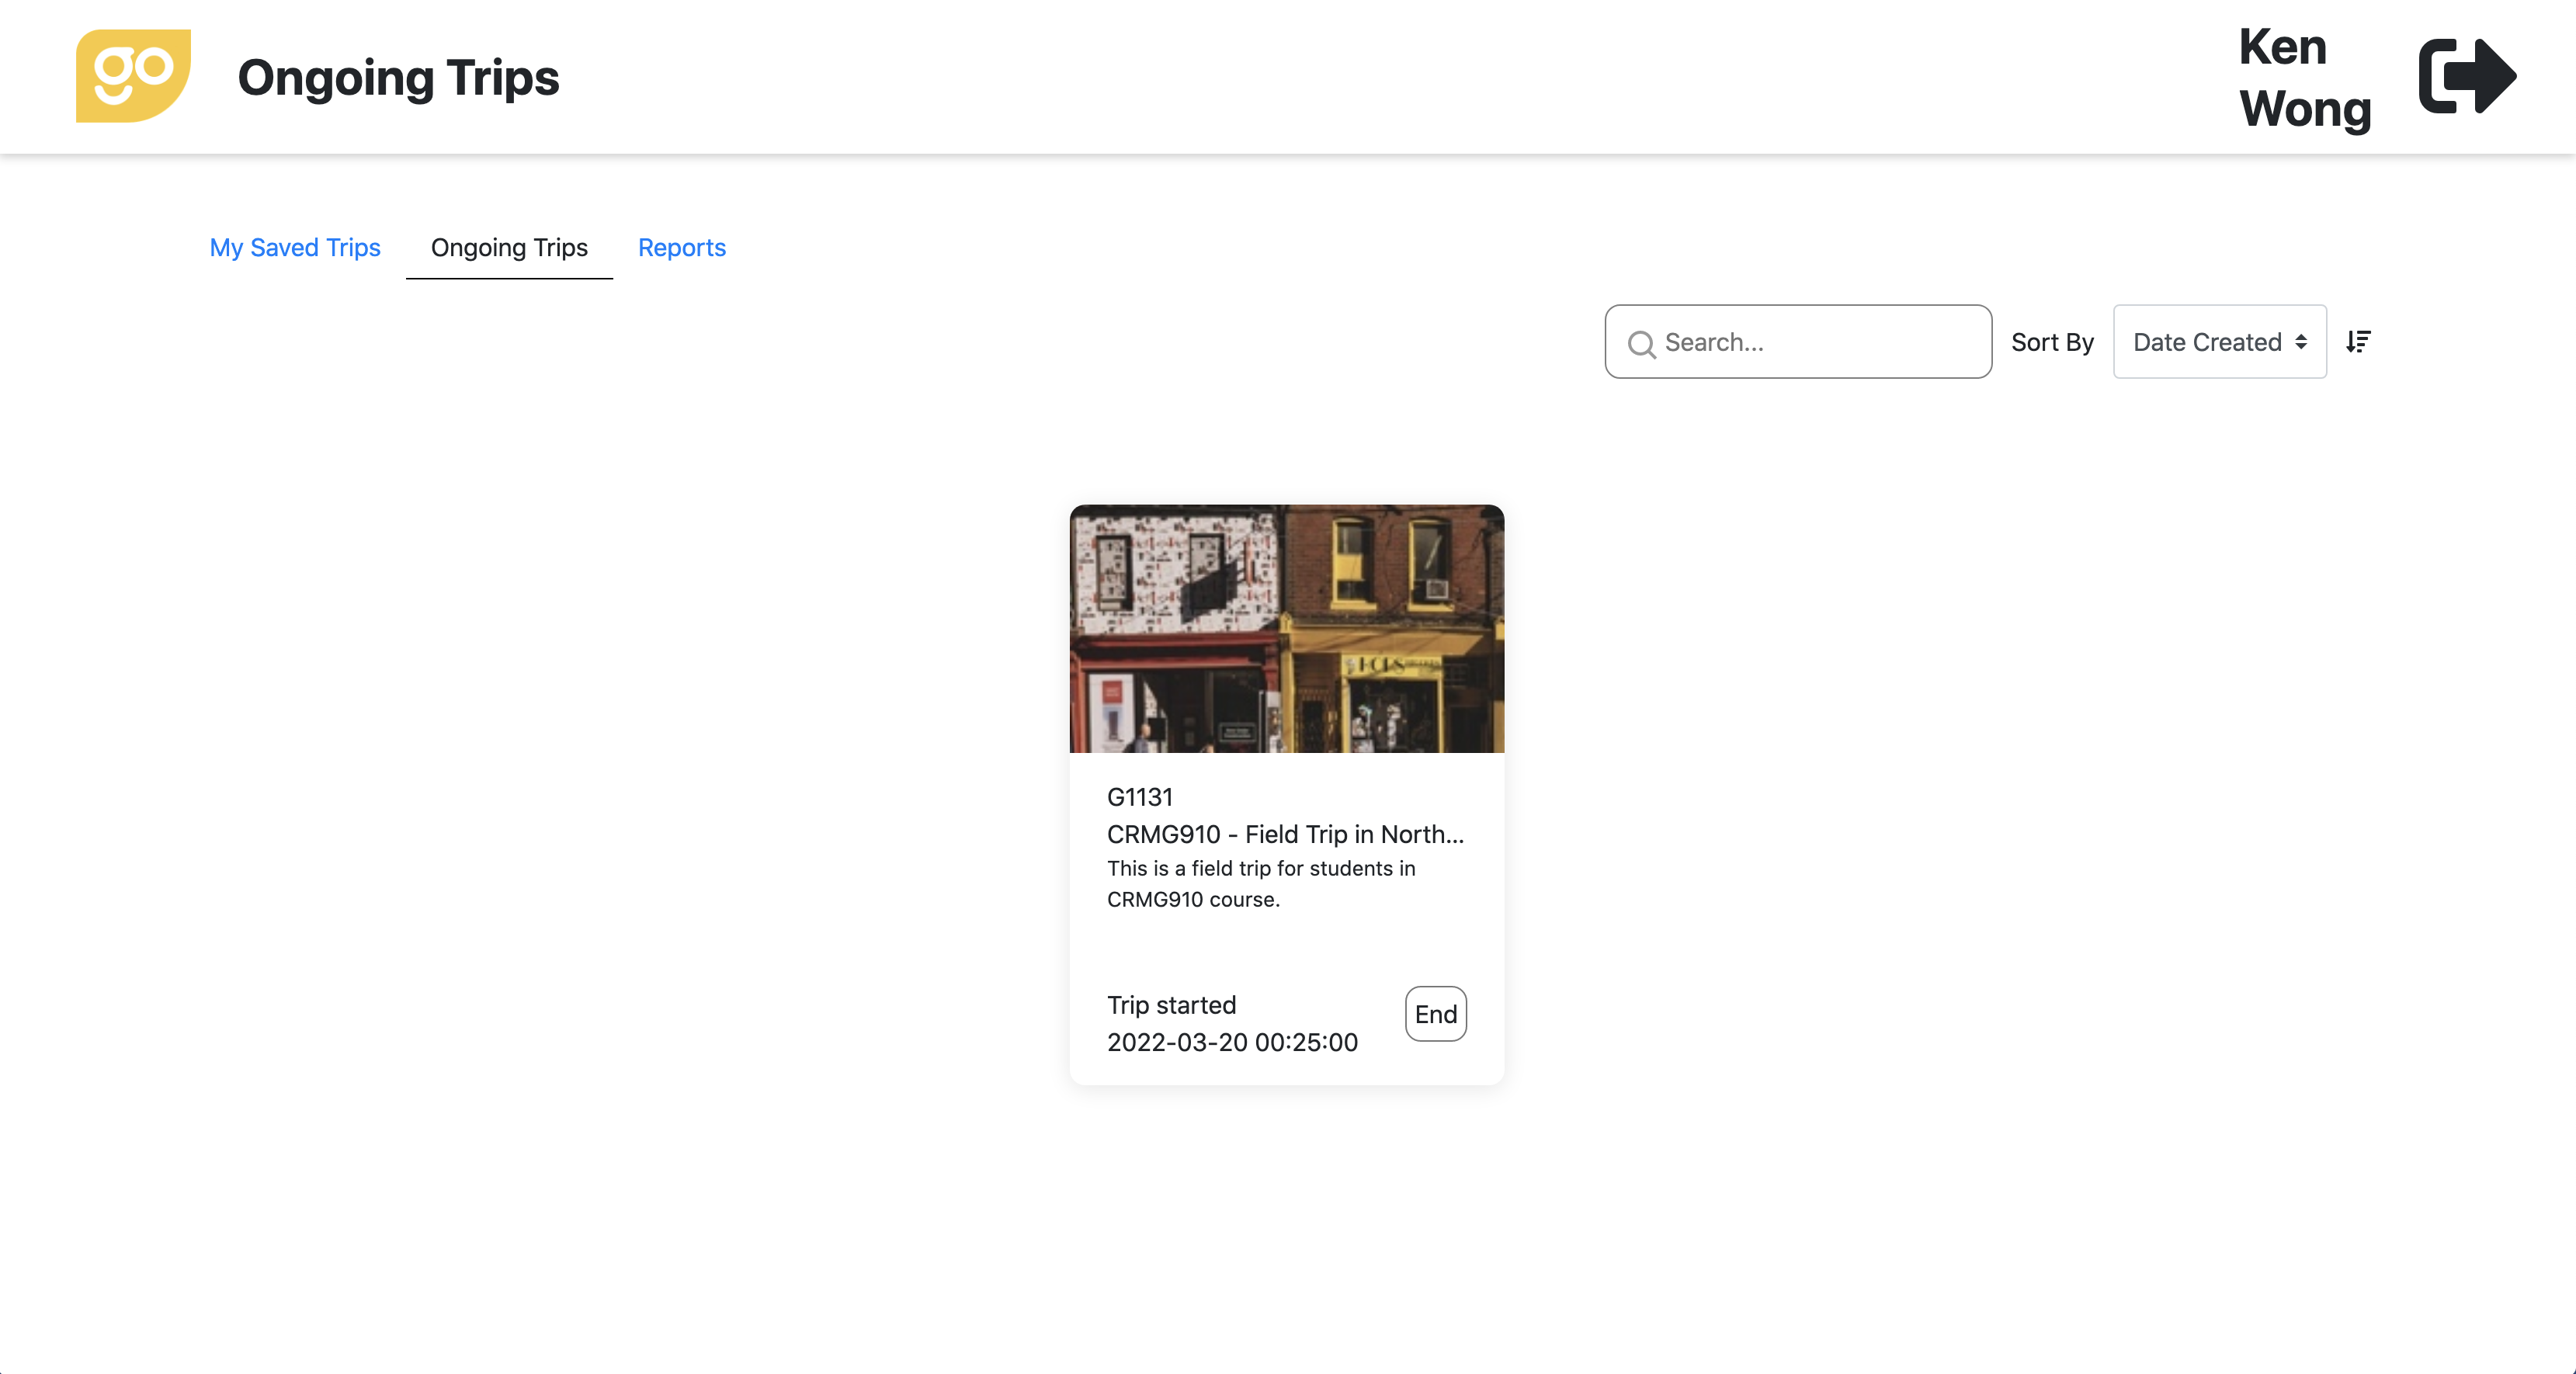
 a. Active, ongoing trips will be shown under the "Ongoing Trips" page. This is also the place where you can double check the session ID for the trip (e.g., G1131). If you need to end the trip manually, just press the "End" button there.
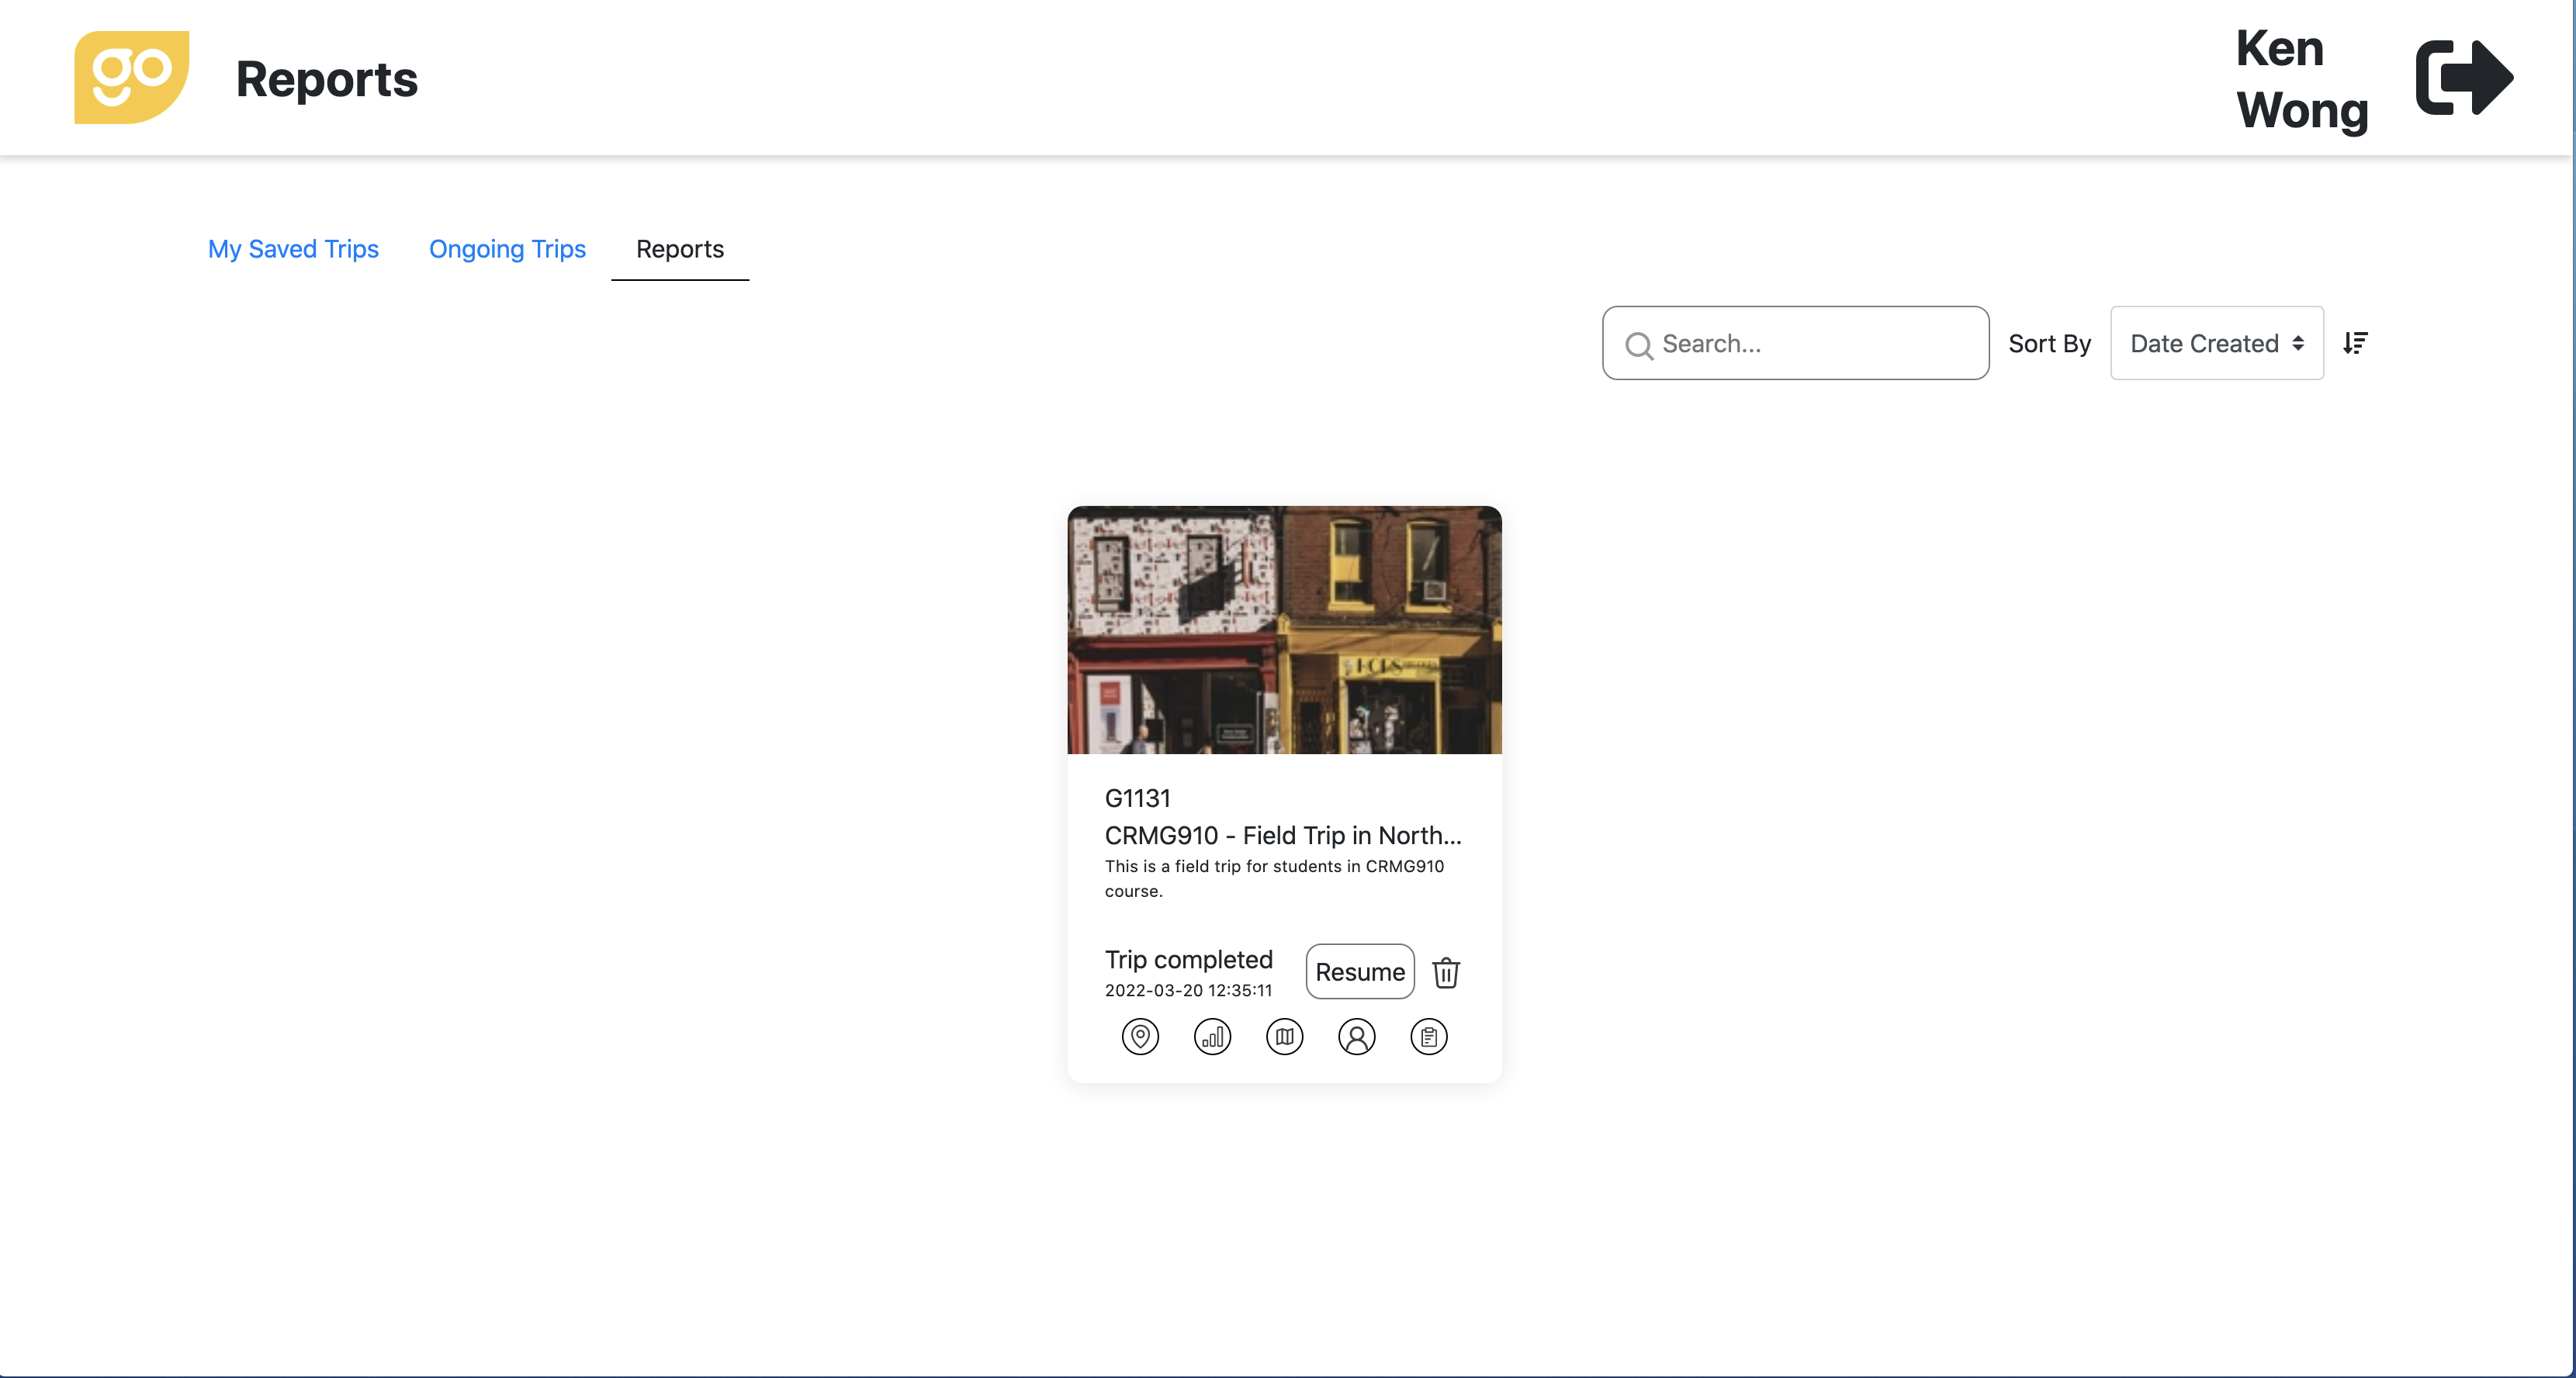
b. When your trip is ended, you can view the results by going to the "Reports" page.
c. Different kinds of information can be shown for each trip:
- Point Analysis
- Ranking
- Map Style report
- Student Details
- Point Details
d. You can also duplicate a trip (under "My Saved Trips", or modify a trip (under "My Saved Trips", or resume a trip that's ended (under "Reports").
 To learn how to show videos and graphics/photos at the checkpoint, check out these design tips here.
Before you send your students out to the field, make sure they've enabled "location permission" on their smartphone. Click here to learn about how to turn this function ON.
